Assigning Perks to Employees
Assign perks so employees receive the benefits they are entitled to. You can add new perks, allocate PEP Coins, or remove perks from an employee's profile — all from the employee detail page.
Before You Begin
View an Employee's Current Perks
1
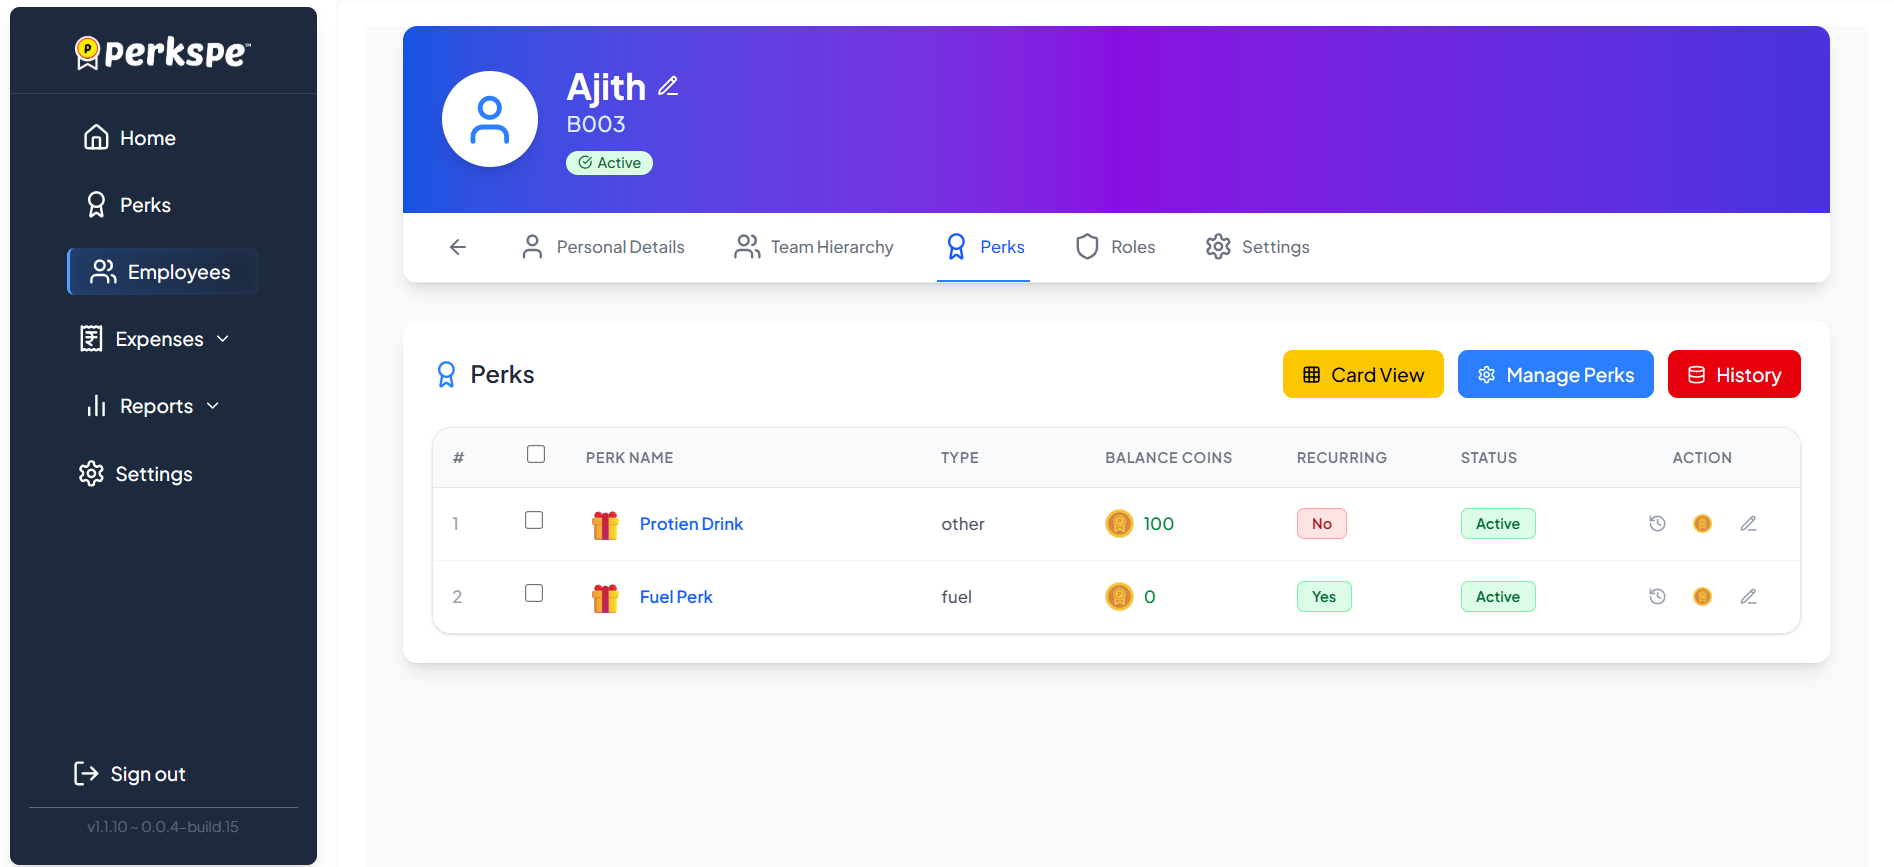
Open ProfileFrom Employees in the sidebar, click an employee's name to open their profile.
2
Go to Perks TabClick the Perks tab to see all perks currently assigned to this employee.
Manage Perks
1
Open DialogOn the Perks tab, click the blue Manage Perks button.
2
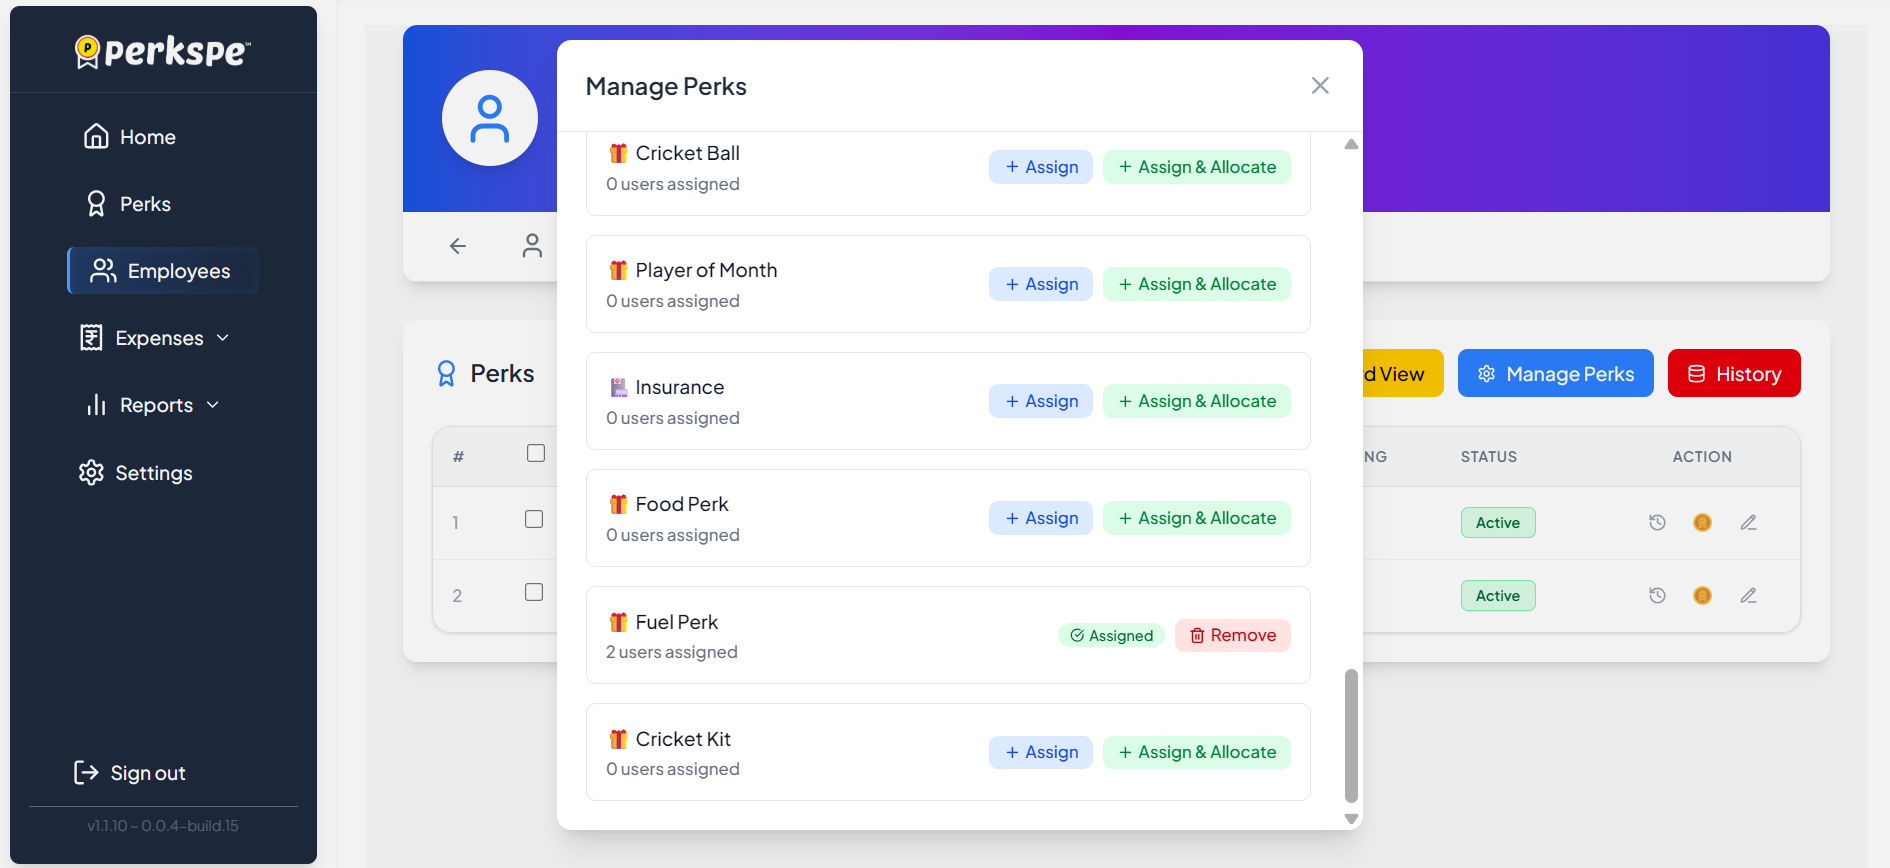
Manage PerksThe dialog shows all available perks. You can click + Assign, + Assign & Allocate, or Remove for any perk.
Understanding Assignment Options
➕
Assign
Link the selected perk to this employee without allocating coins yet.

Assign & Allocate
Link the perk and immediately credit PEP Coins to the employee.
🗑️
Remove
Click Remove to unassign the perk from the employee.
View Transactions History
1
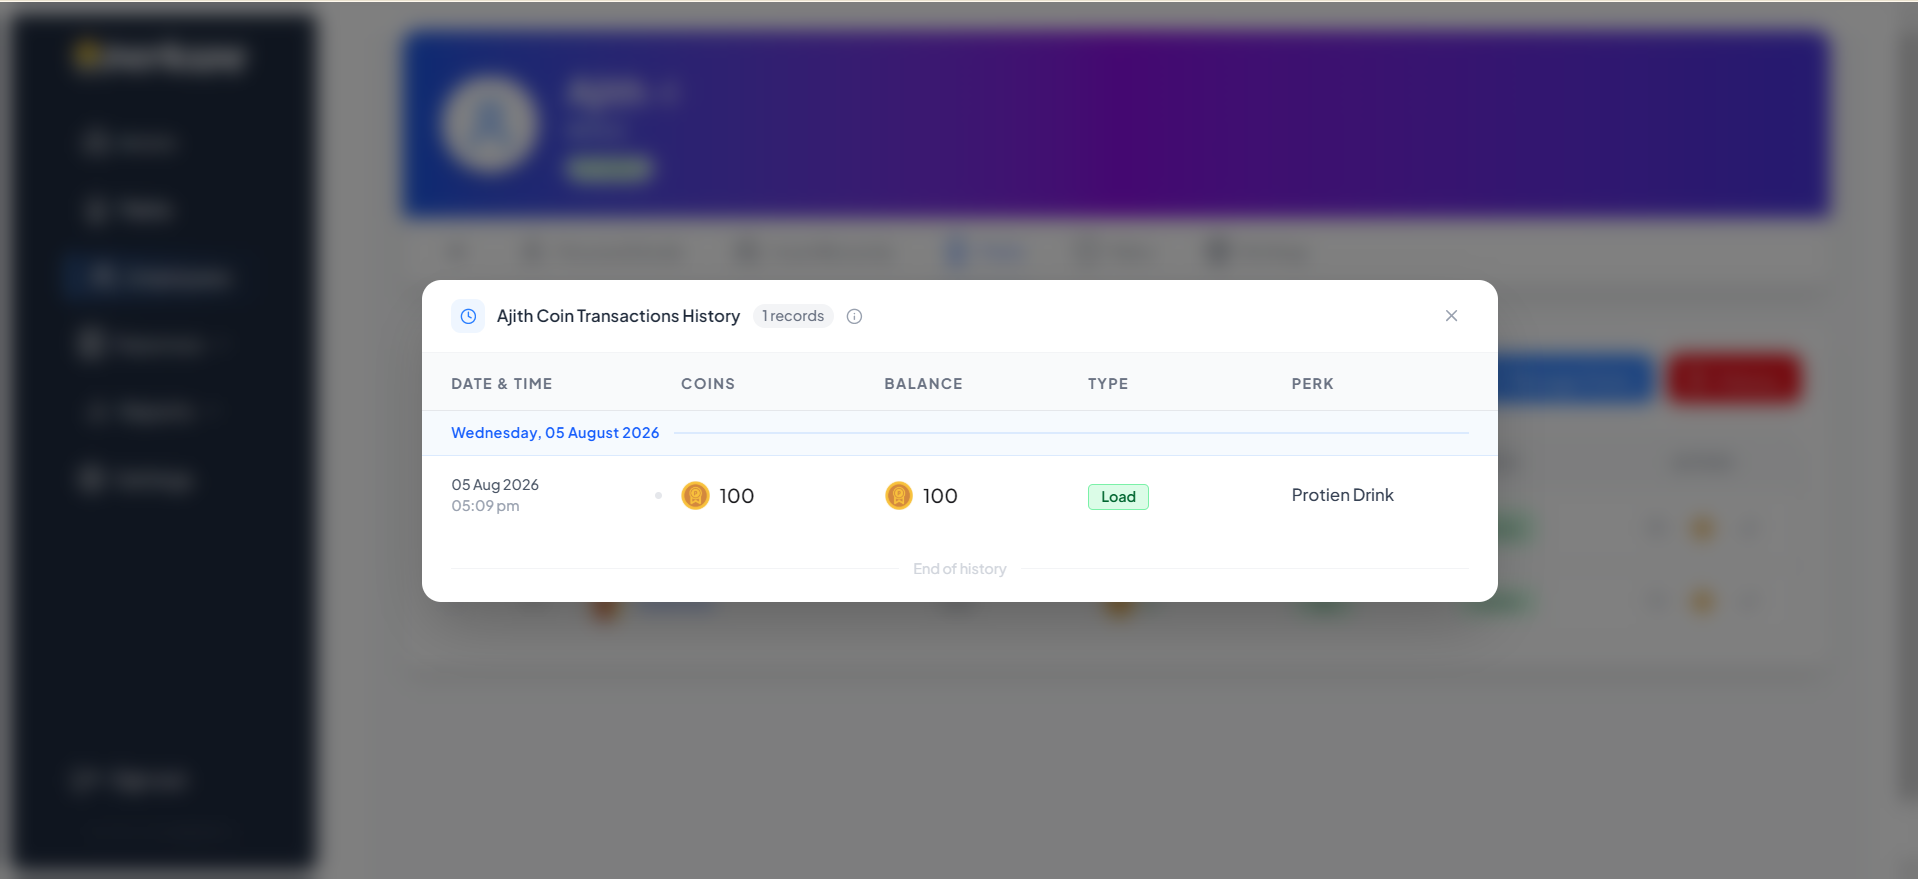
Open HistoryOn the Perks tab, click the red History button to view the employee's coin transactions history.
2
Review RecordsView a detailed log of all perk-related coin loads, deductions, and balances.
Quick Reference
Summary Steps
| Task | Steps |
|---|---|
| View employee's perks | Employees → select employee → Perks tab |
| Manage assigned perks | Perks tab → Manage Perks → click Assign or Remove |
| View perk history | Perks tab → History |
Tip: During onboarding, you assign perks to all employees in Step 6 (Provide Perks). Use this guide for individual changes after setup.