Onboarding Process
Welcome to PerksPe! This guide walks you through setting up your organization from start to finish.
We have prepared a complete 7-step onboarding walkthrough video — from setting up your organization to assigning perks to employees. Follow along with the detailed guide below.
The onboarding follows PERKSPE — an easy way to remember each step:
Enter your company's official information. Click Create Role to proceed.
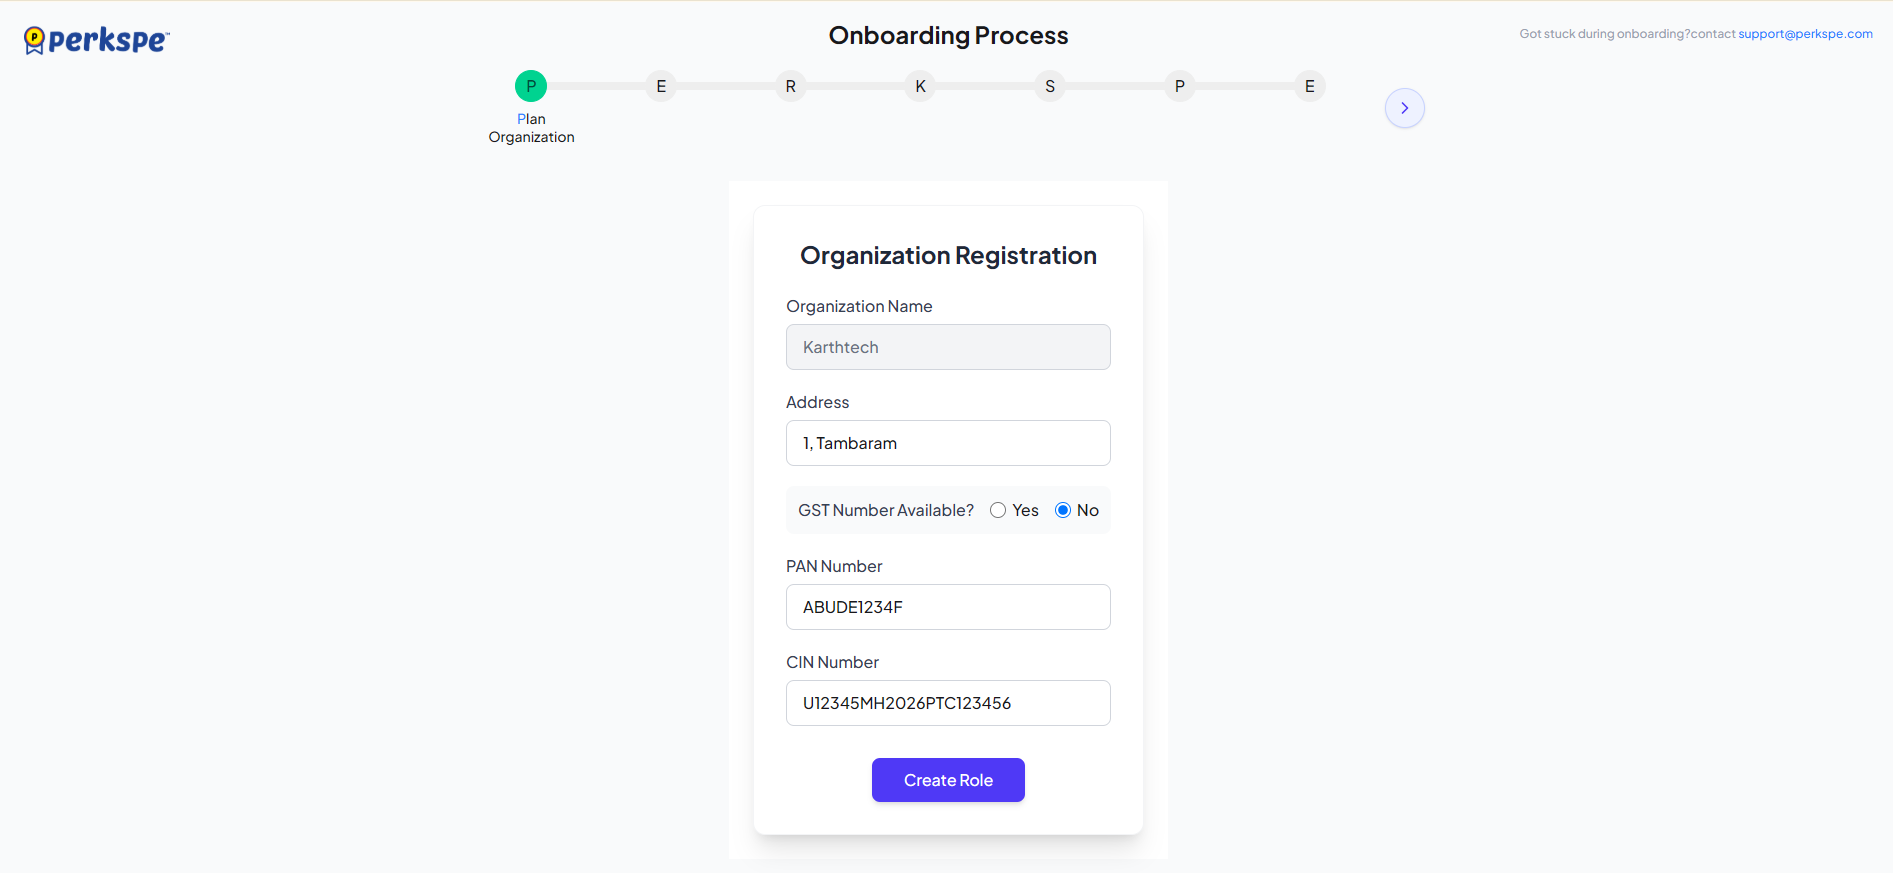
Required Information Fields
| Field | Description | Format |
|---|---|---|
| Organization Name | Your company's full legal name | As per ROC(Registrar of Companies) |
| Address | Company registered address | Text |
| GST Number | (Optional) Your GST number | 15-char alphanumeric |
| PAN Number | Organization's PAN | 10-char alphanumeric |
| CIN Number | Corporate Identification Number | 21-char alphanumeric |
Define who can do what in your organization. Click Create Perk to proceed.
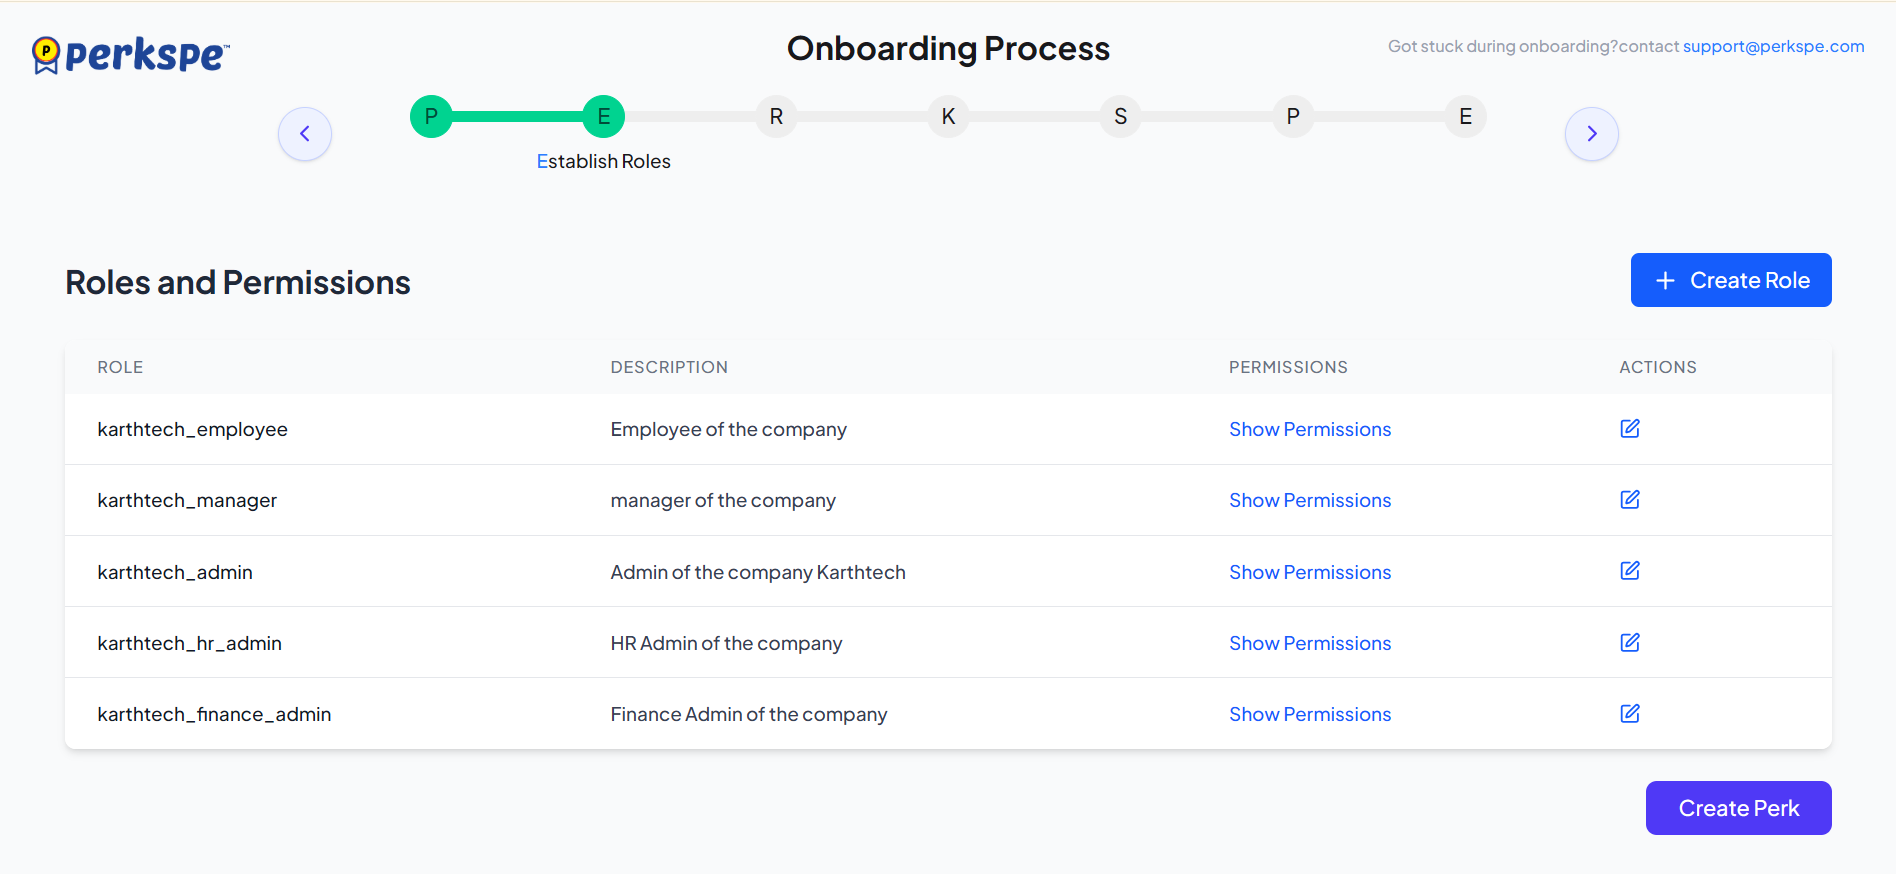
Default Roles
PerksPe provides these roles automatically:
Employee
View perks, manage your card, and submit expense claims.
Manager
Manage team members and review employee requests.
HR Admin
Manage employee perks, rewards, and HR reports.
Finance Admin
Manage expenses, reimbursements, and finance reports.
Admin
Full access to users, roles, settings, perks, and expenses.
Create a Custom Role
Need a specialized role? Click + Create Role. Provide a Role Name, Description, and select Permissions.
Create the benefits employees will receive.
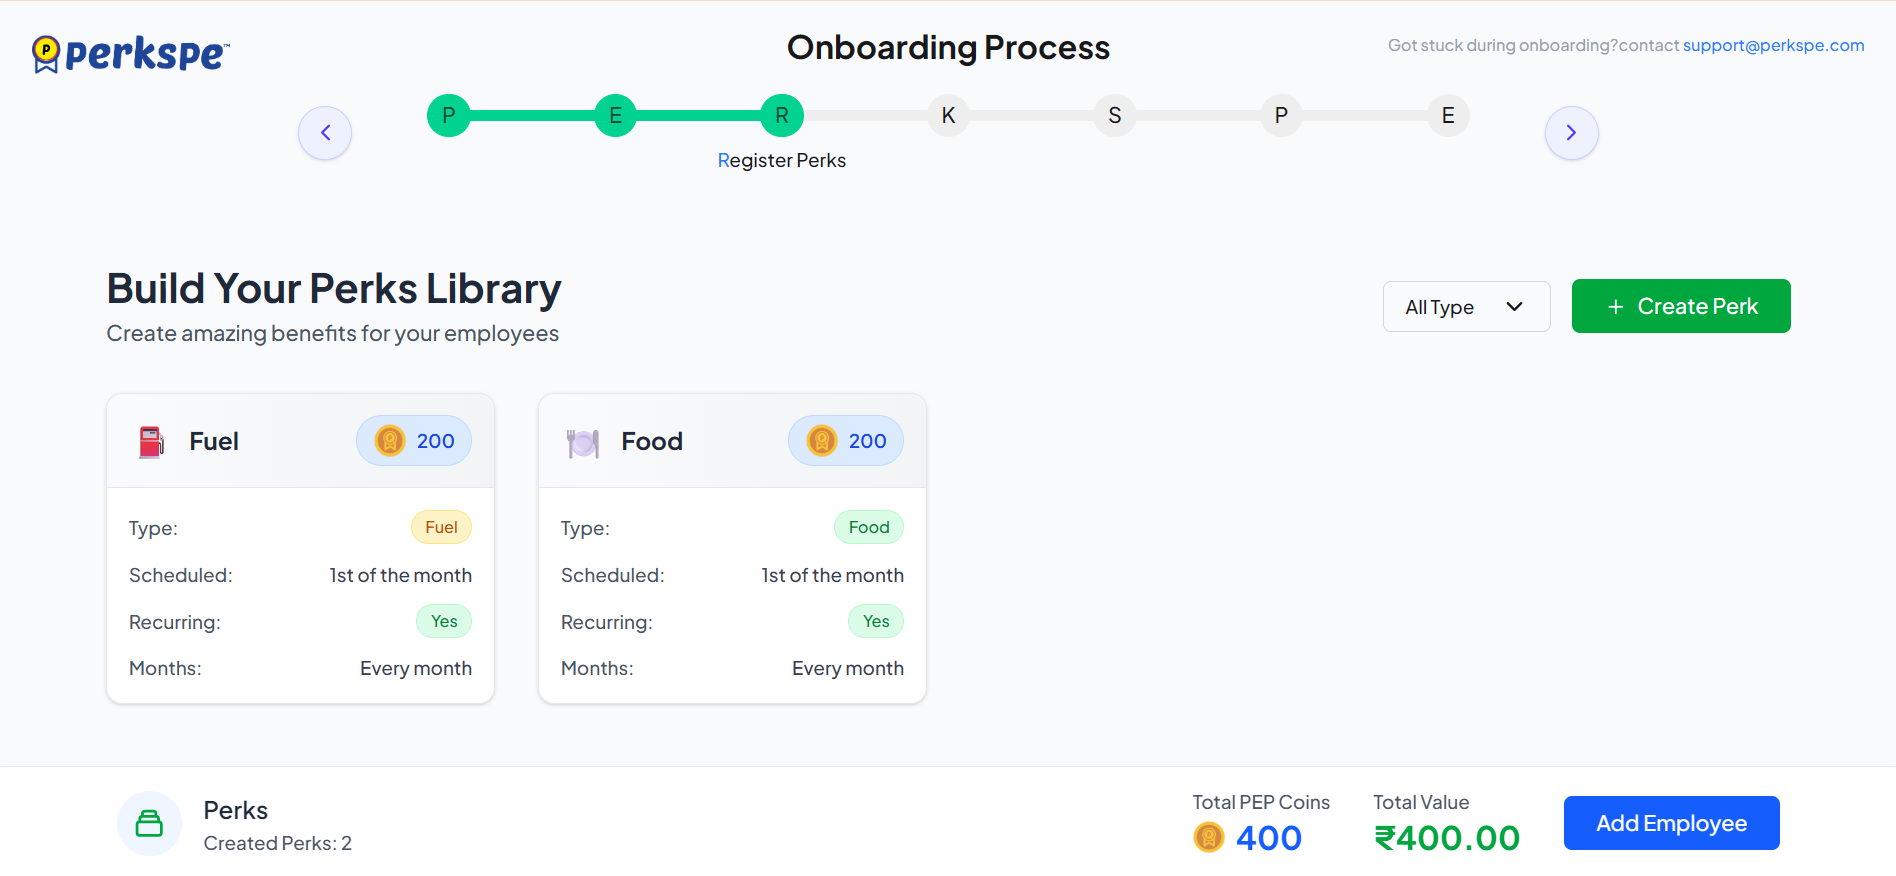
Creating a New Perk
Click + Create Perk to open the wizard.
- Basic Information: Name, Emoji, Short Name, PEP Coins value (1 Coin = ₹1), and Type (Food, Medical, Fuel, etc.).
- Scheduling Options:
- One-Time: For Anniversary, Birthday, or fixed bonuses. Set pre-assignment days.
- Ad Hoc: Distribute on-demand as needs arise (initial coins set to 0, loaded manually).
- Rewards & Recognition: Category, frequency, maximum allocation.
- Others: Choose one-time or ad hoc.
- Review & Create: Review all details and click Create Perk.
Add your team members to PerksPe.
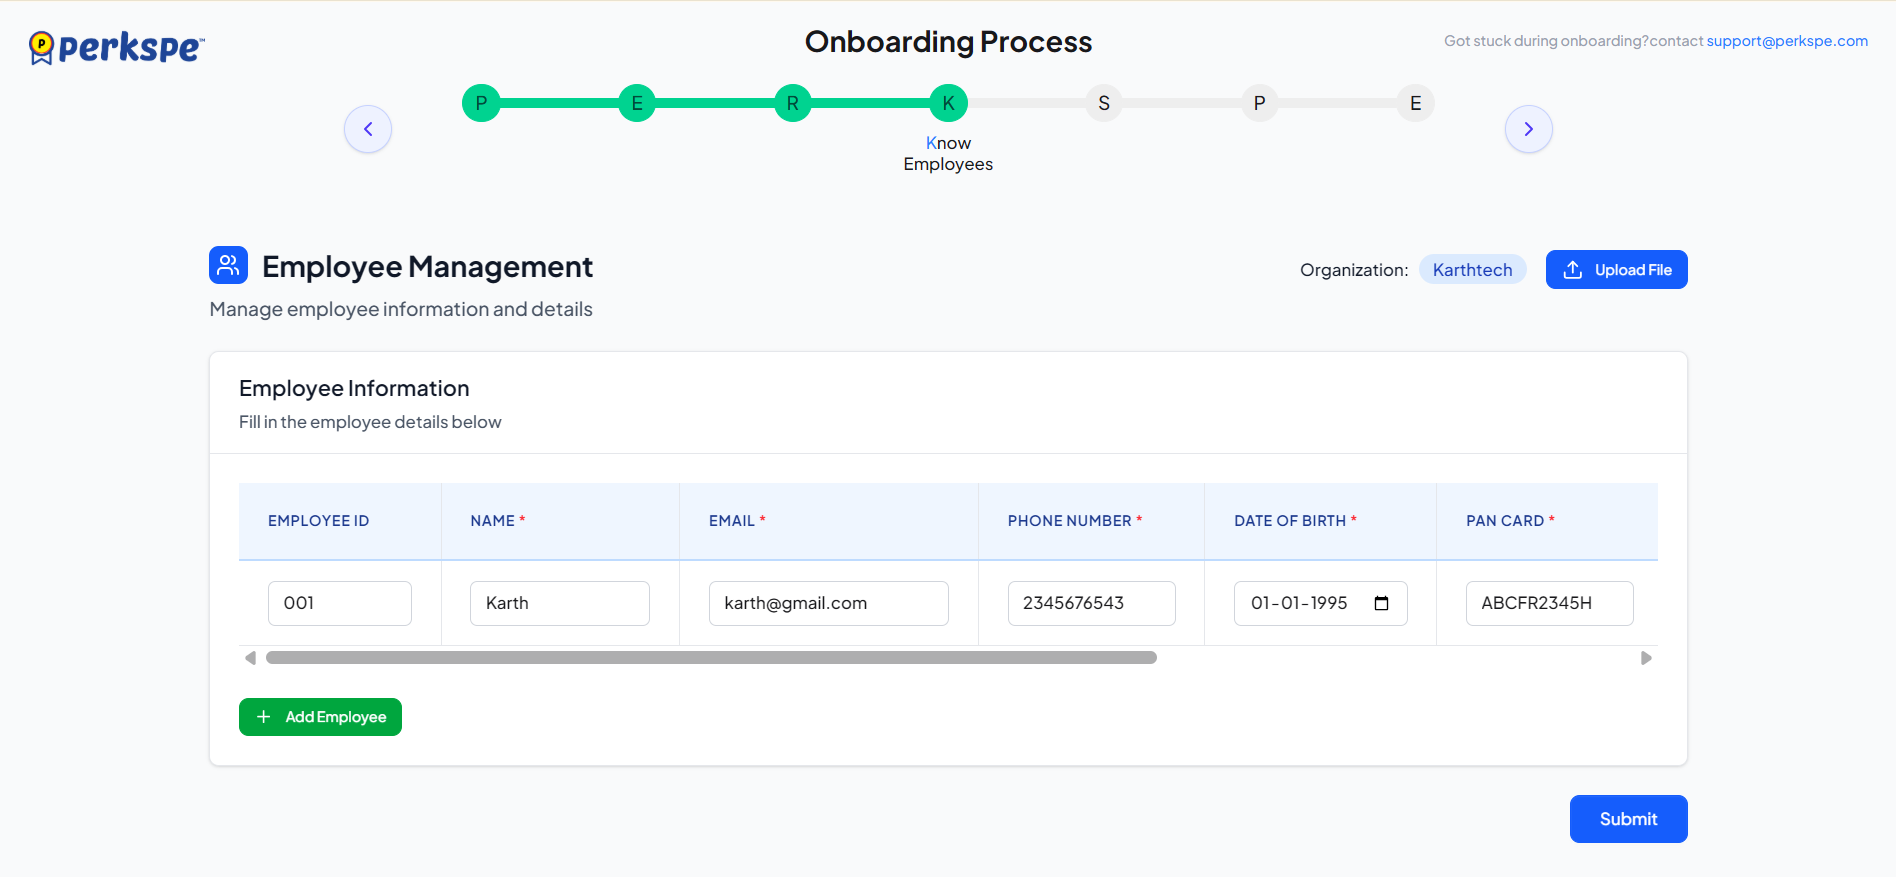
Option A: Manual Entry
Enter employee details manually one by one.
| Required Fields | Description |
|---|---|
| Employee ID | Your internal ID, if exists |
| Full Name & Email | Name and work email |
| Phone Number | 10-digit mobile number |
| DOB & DOJ | Dates for Birth and Joining (DD-MM-YYYY) |
| PAN Number | Employee PAN |
| Portal Access | Yes (can log in to web app) or No |
Action: Click + Add Employee, then Submit.
Option B: Upload File (Bulk Import)
- Click Upload File.
- Download the sample CSV.
- Fill it out with required columns (Name, Email, Phone, DOB, DOJ, PAN, Type, Portal Access).
- Upload file and click Submit.
Assign employees to the appropriate roles.
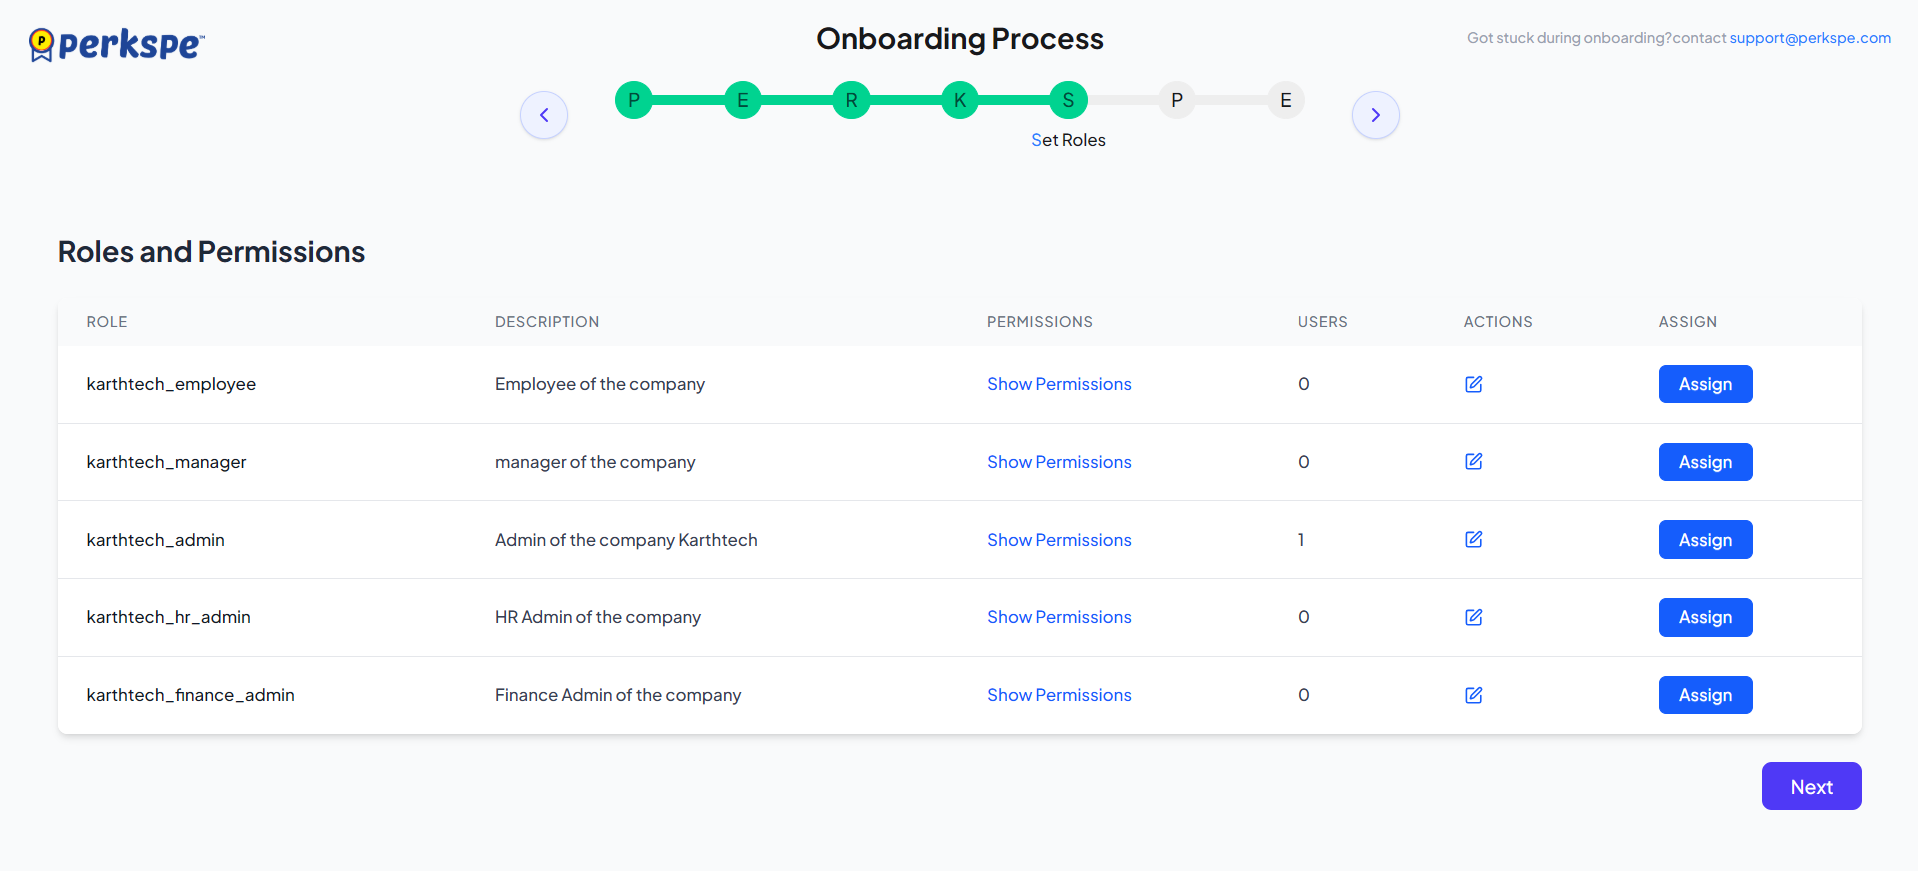
- Click Assign next to the desired role.
- Select one or more employees.
- Click Assign n Employee(s) to confirm.
Assign the created perk to one or more employees.
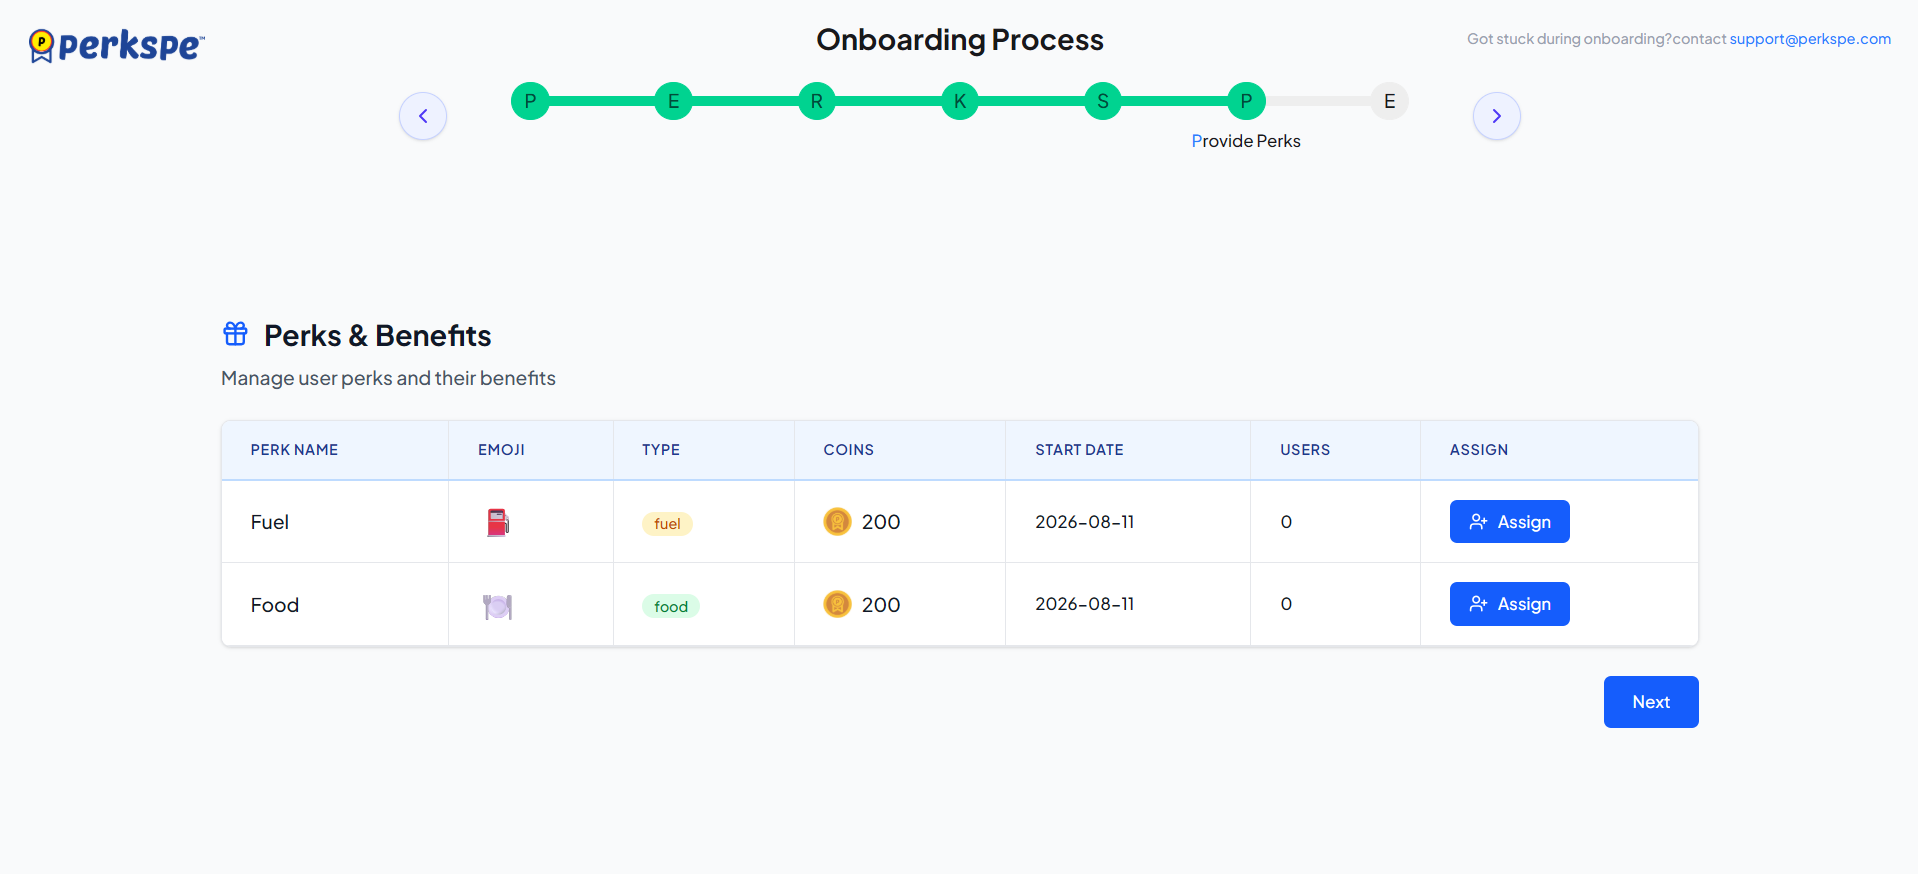
-
Select the perk you created.
-
Choose the employees who should receive the perk.
-
Choose one of the following options:
-
Assign – Assigns the perk to the selected employees. If the perk has a scheduled allocation (for example, on the 1st of every month), coins will be allocated automatically by the scheduler on the configured date.
-
Assign & Allocate – Assigns the perk and immediately allocates the coins to the selected employees. Since the current allocation has already been completed, the scheduler will not allocate the same cycle again.
-
Review everything before completing setup.
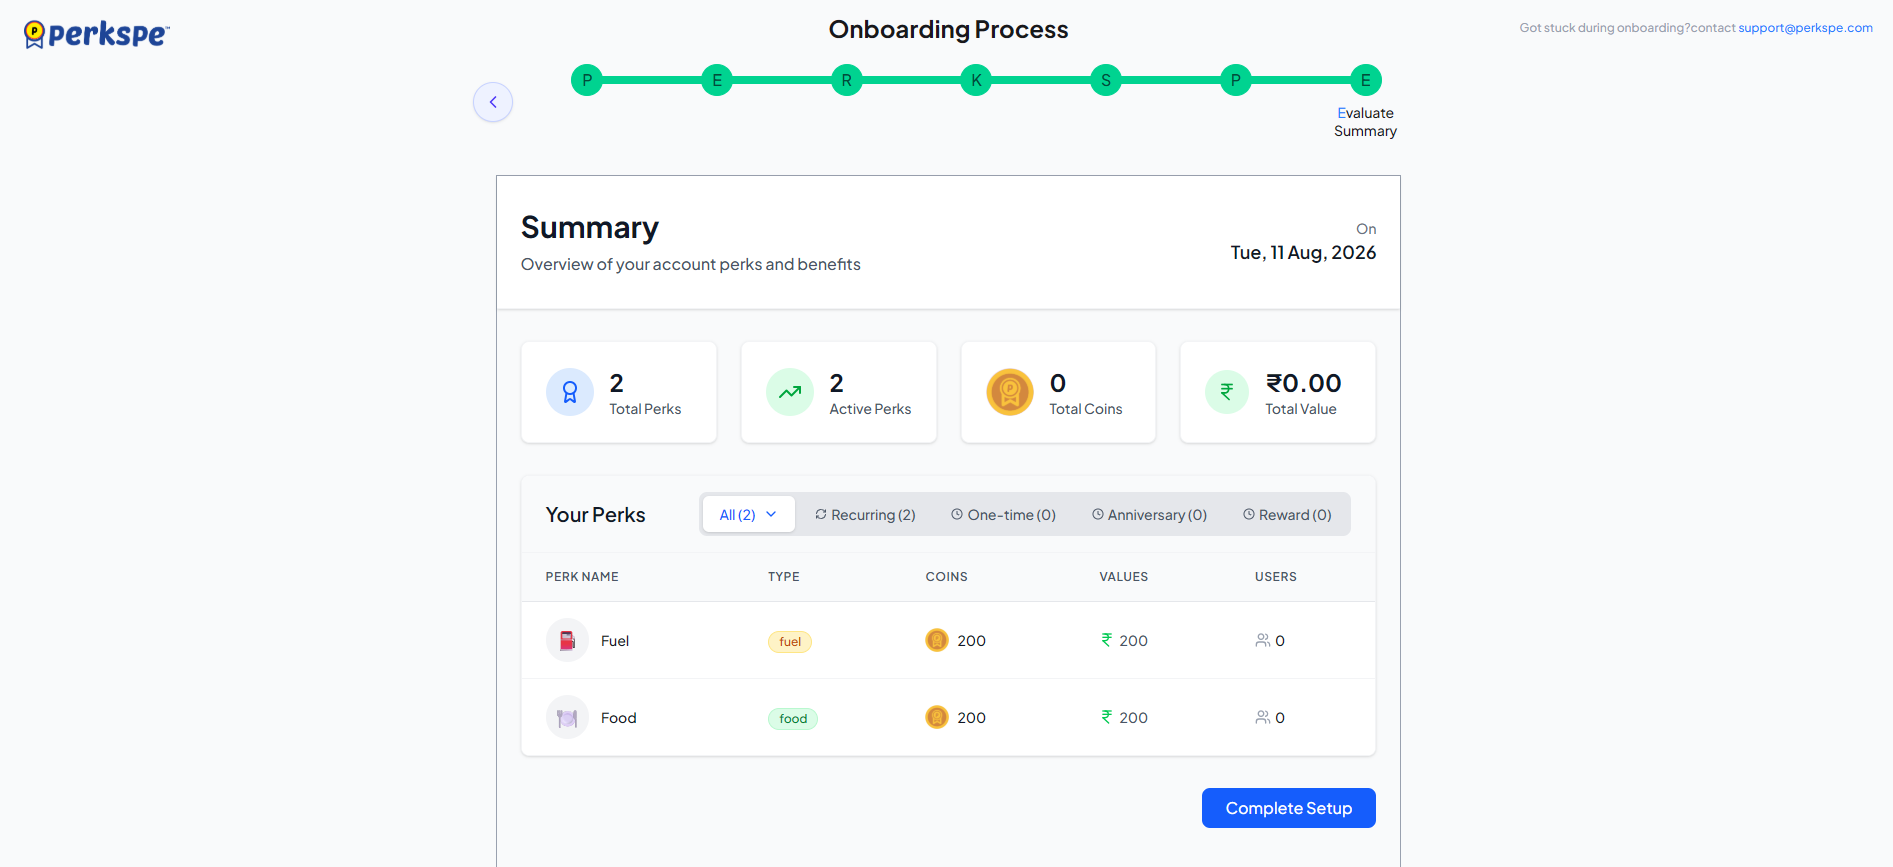
If everything looks correct (Organization, Roles, Perks, Employees, Assignments), click Complete Setup.
🎉 Congratulations! Your PerksPe organization is now ready.