Adding Comments
The Comments section lets employees and approvers communicate directly within an expense entry. Use comments to ask questions, provide clarification, or give feedback.
Why Use Comments?
| Use Case | Example |
|---|---|
| Request information | "Can you provide the itemized receipt?" |
| Clarify details | "This was for the client meeting on March 15th" |
| Explain rejection | "Amount exceeds daily limit. Please split into two entries." |
| Confirm approval | "Approved. Great job on the client presentation!" |
How to Add a Comment
Step 1: Open the Expense
- Go to Expenses menu
- Click on the expense you want to comment on
Step 2: Go to Comments Section
Scroll down to find the Comments section.

Step 3: Click Add Comment
Click the Comment button.
![]()
Step 4: Type Your Message
Write your comment in the text box.
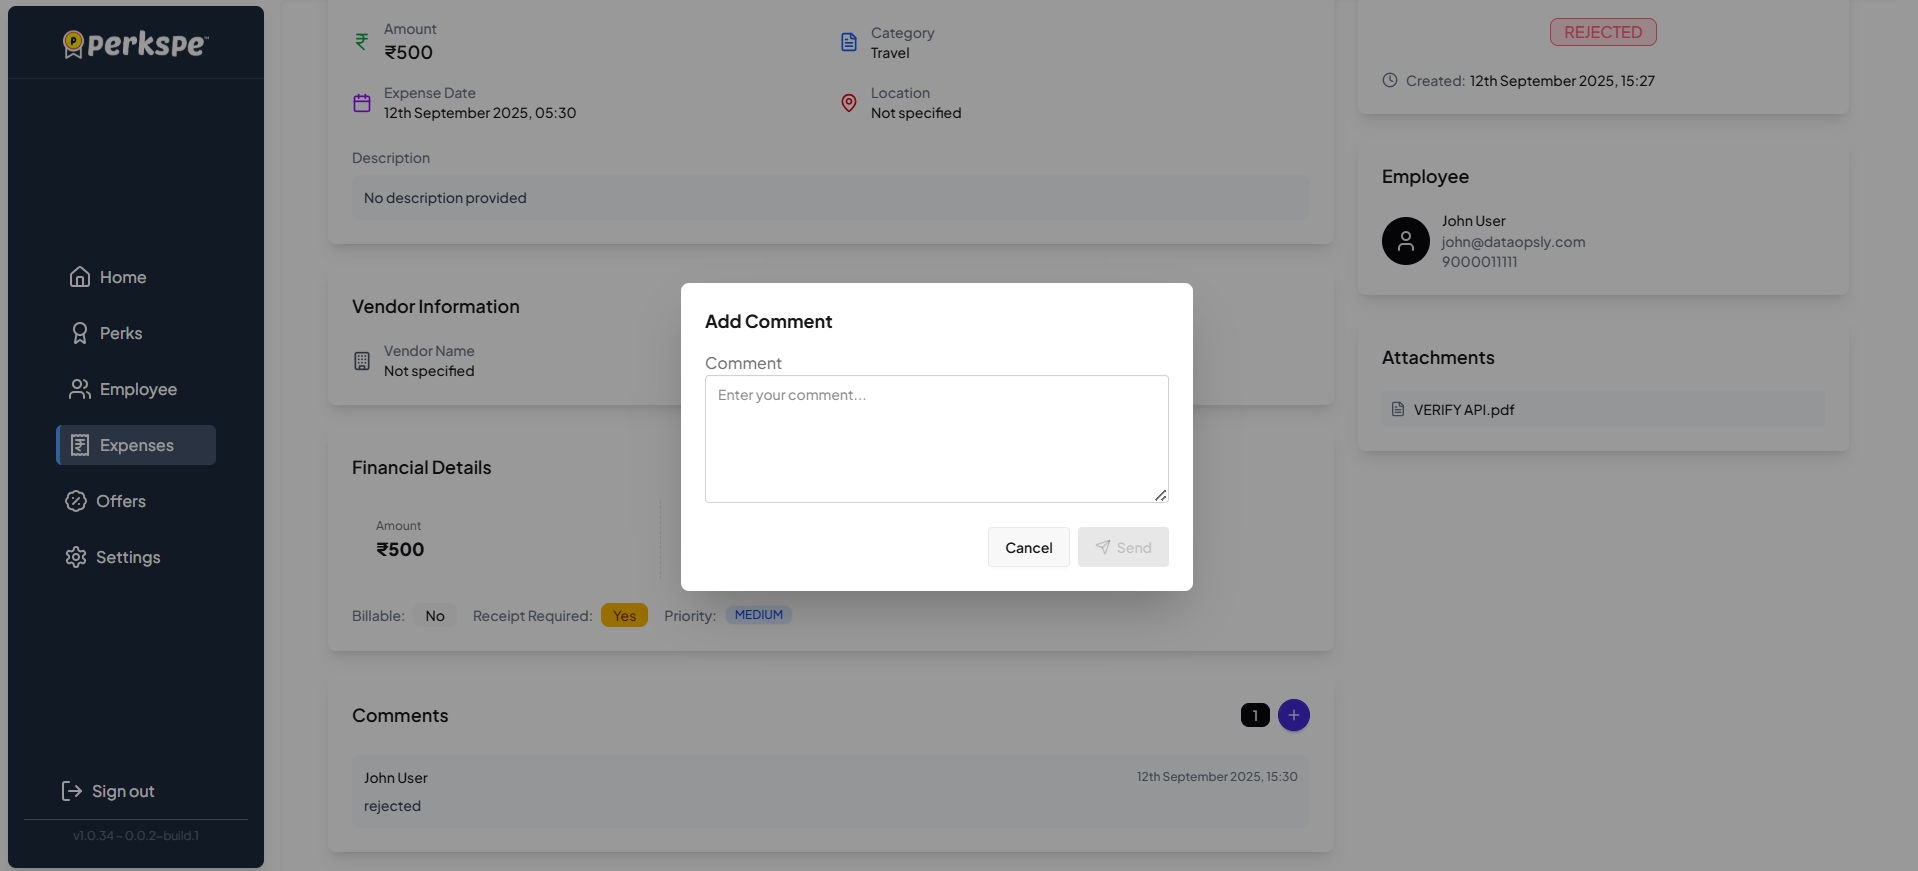
Step 5: Send
Click Send to post your comment.
Who Can See Comments?
| Role | Can See | Can Add |
|---|---|---|
| Employee (expense creator) | ✅ All comments | ✅ Yes |
| Approver | ✅ All comments | ✅ Yes |
| Finance Team | ✅ All comments | ✅ Yes |
Comments are visible to everyone involved in the expense workflow.
Tips for Effective Comments
tip
- Be specific — mention exactly what's needed
- Be professional — comments are part of the audit trail
- Respond promptly — helps speed up approval