Onboarding Process
Welcome to PerksPe! This guide walks you through setting up your organization from start to finish.
Overview: The 7 Steps
The onboarding follows PERKSPE — an easy way to remember each step:
| Step | Name | What You Do |
|---|---|---|
| P | Plan Organization | Enter company details |
| E | Establish Roles | Set up user roles and permissions |
| R | Register Perks | Create employee benefits |
| K | Know Employees | Add your team members |
| S | Set Roles | Assign roles to employees |
| P | Provide Perks | Assign perks to employees |
| E | Evaluate Summary | Review and complete setup |
A progress bar at the top shows which step you're on.
Step 1: Plan Organization
Enter your company's official information.

Required Information
| Field | Description |
|---|---|
| Organization Name | Your company's official name |
| Address | Company registered address |
| GST Number | Select Yes/No — if Yes, enter your GST number |
| PAN Number | Organization's PAN |
| CIN Number | Corporate Identification Number |
Action
Click Create Role to proceed.
Step 2: Establish Roles
Define who can do what in your organization.
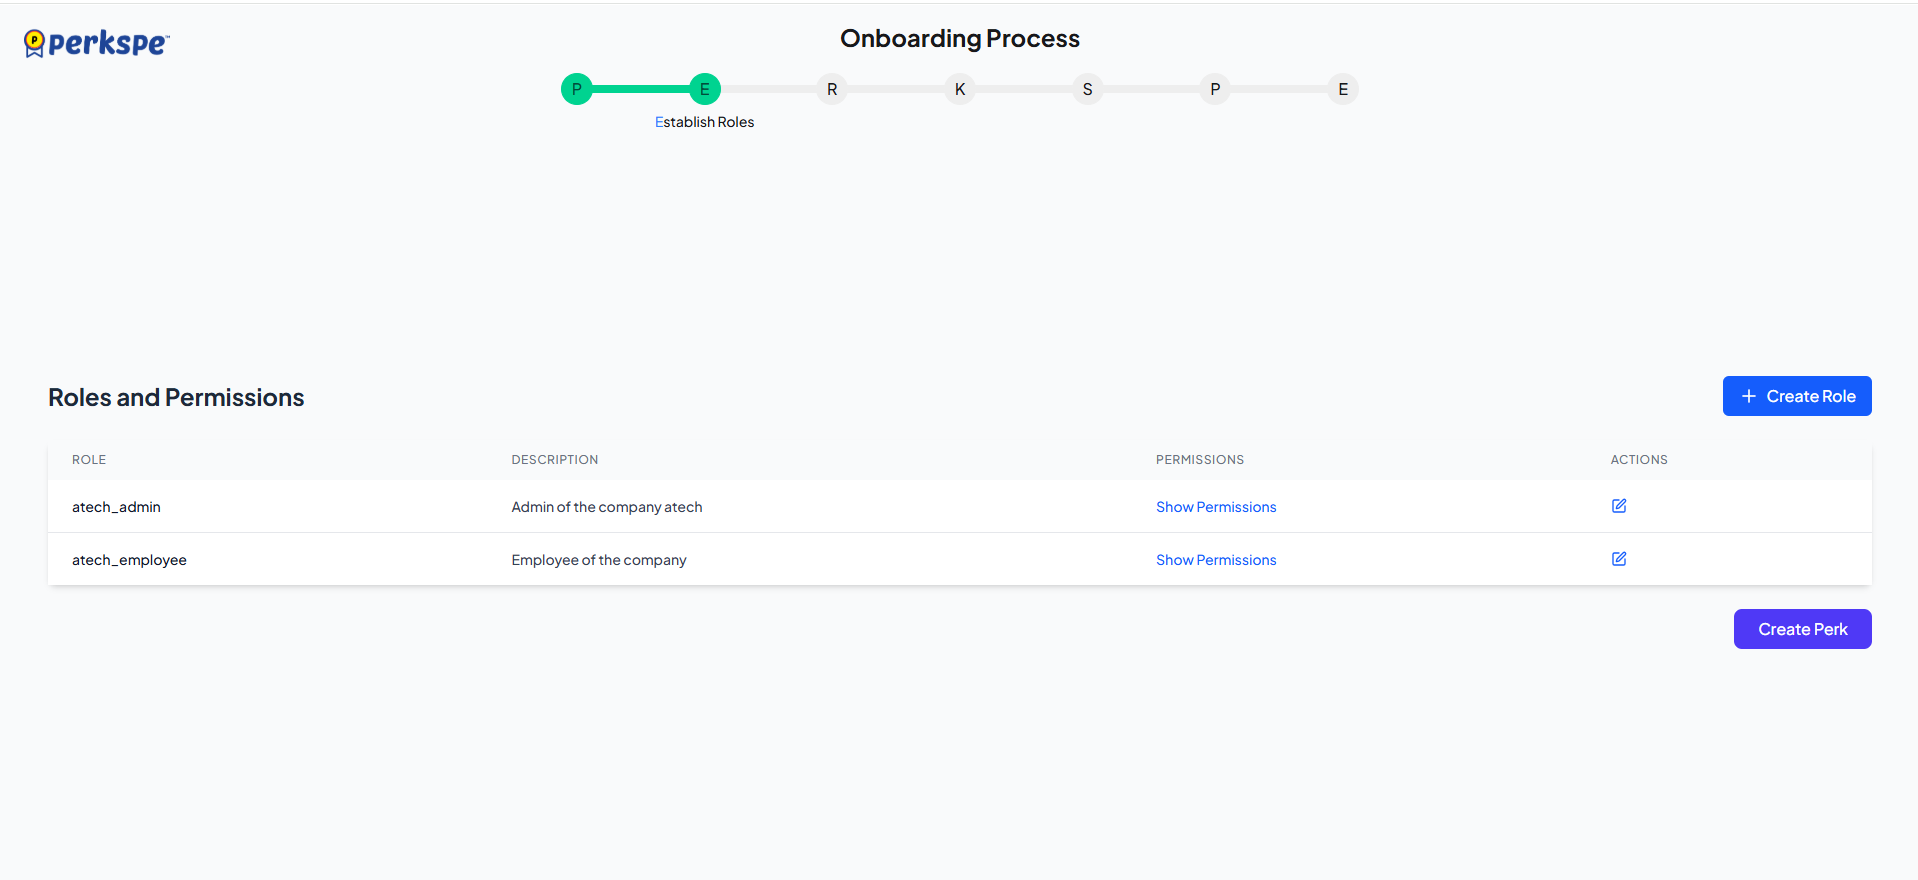
Default Roles
PerksPe provides these roles automatically:
| Role | Description |
|---|---|
| Employee | Can view and redeem their own perks |
| Manager | Can view team perks and approvals |
| Admin | Full access to all settings |
Click Show Permissions on any role to see its access rights.
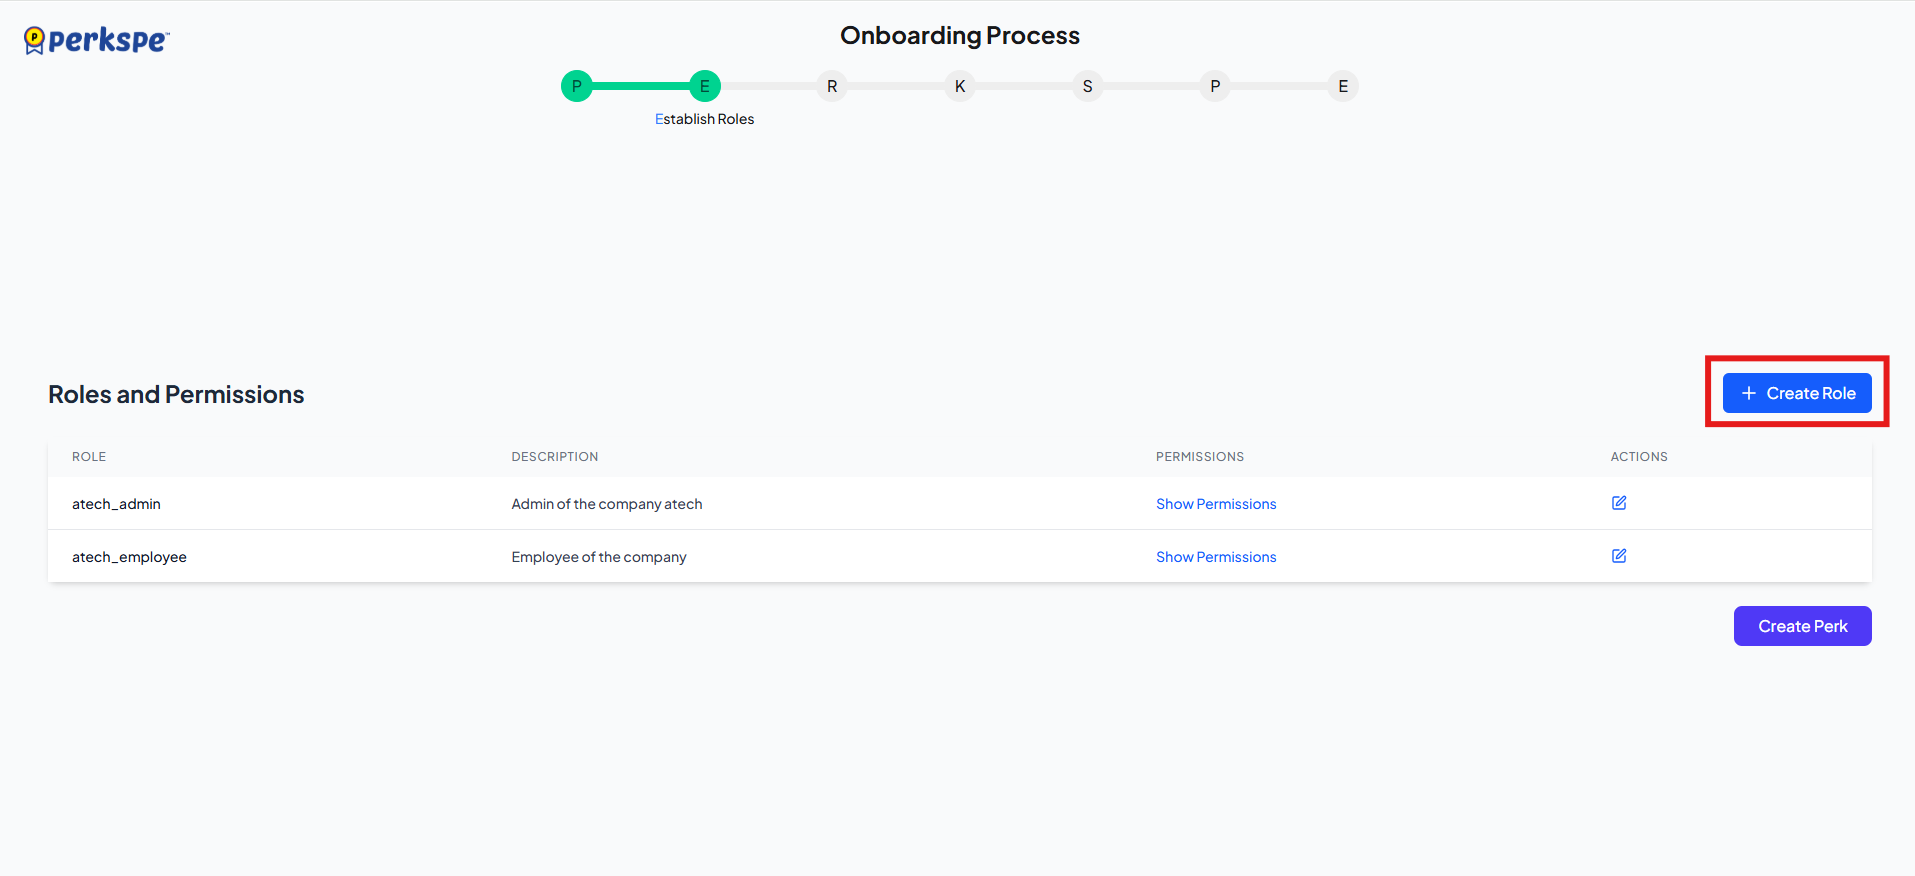
Create a Custom Role
Need a specialized role? Click + Create Role.
| Field | Required | Description |
|---|---|---|
| Role Name | ✅ | Name of the new role |
| Description | ✅ | What this role is for |
| Permissions | ✅ | Select from dropdown list |
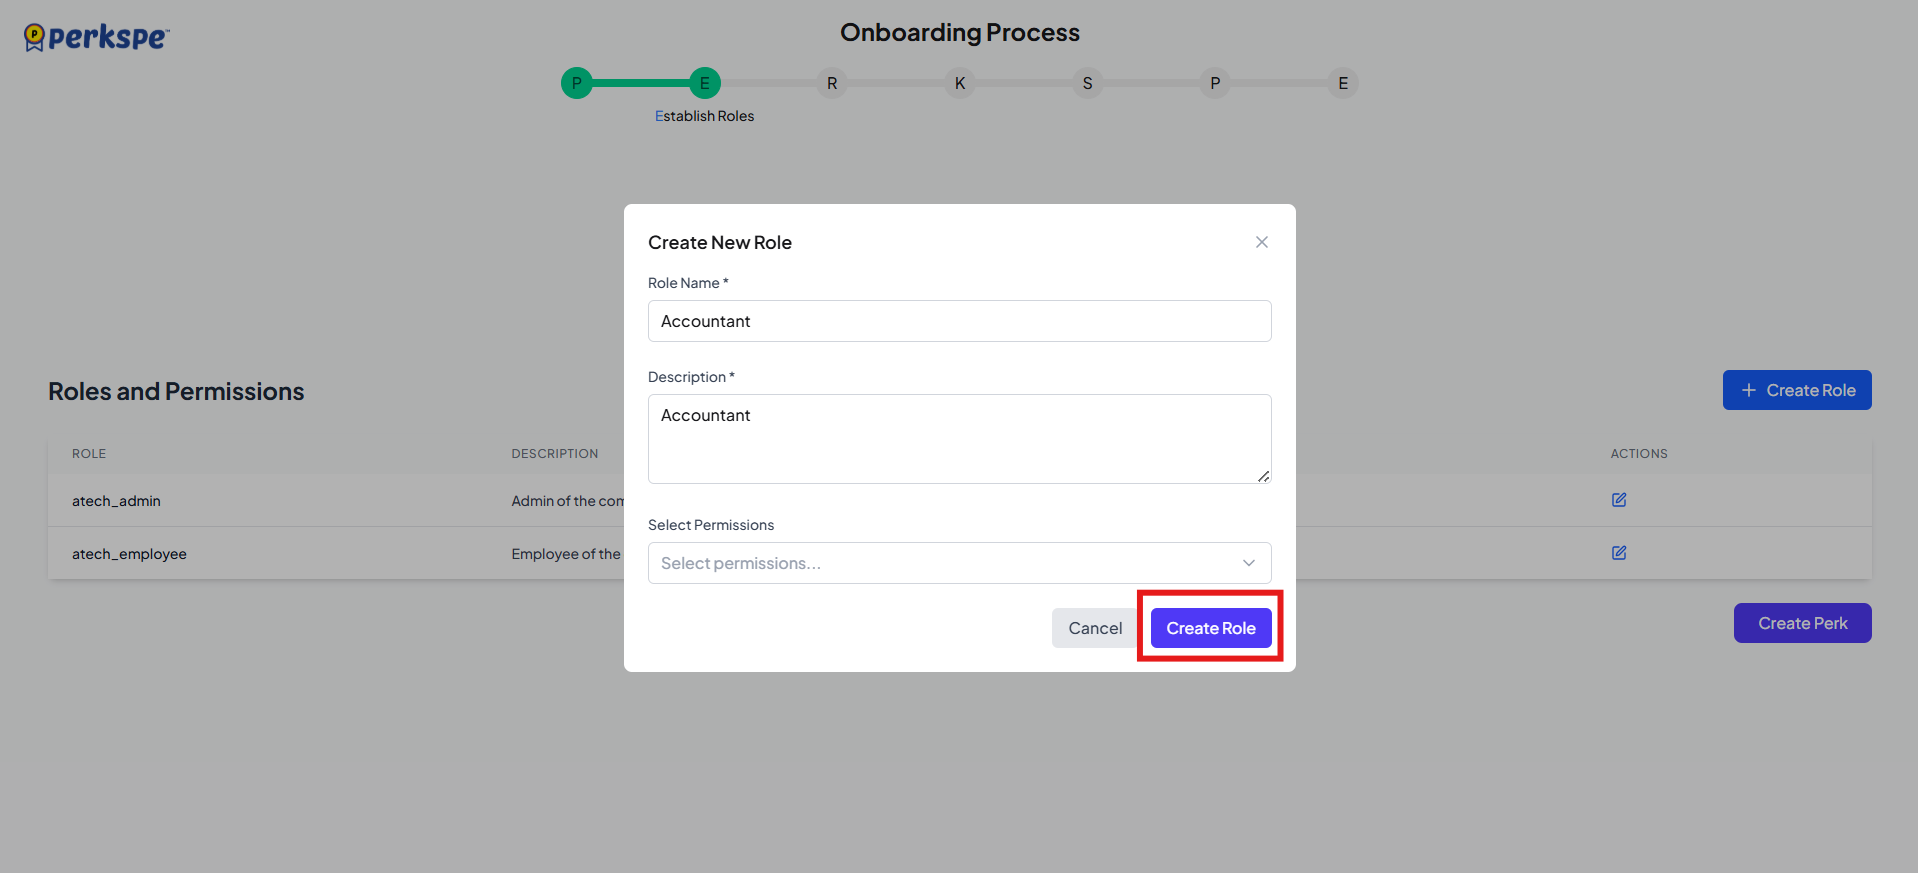
Action
Click Create Perk to proceed.
Step 3: Register Perks
Create the benefits employees will receive.
Perks Library Dashboard
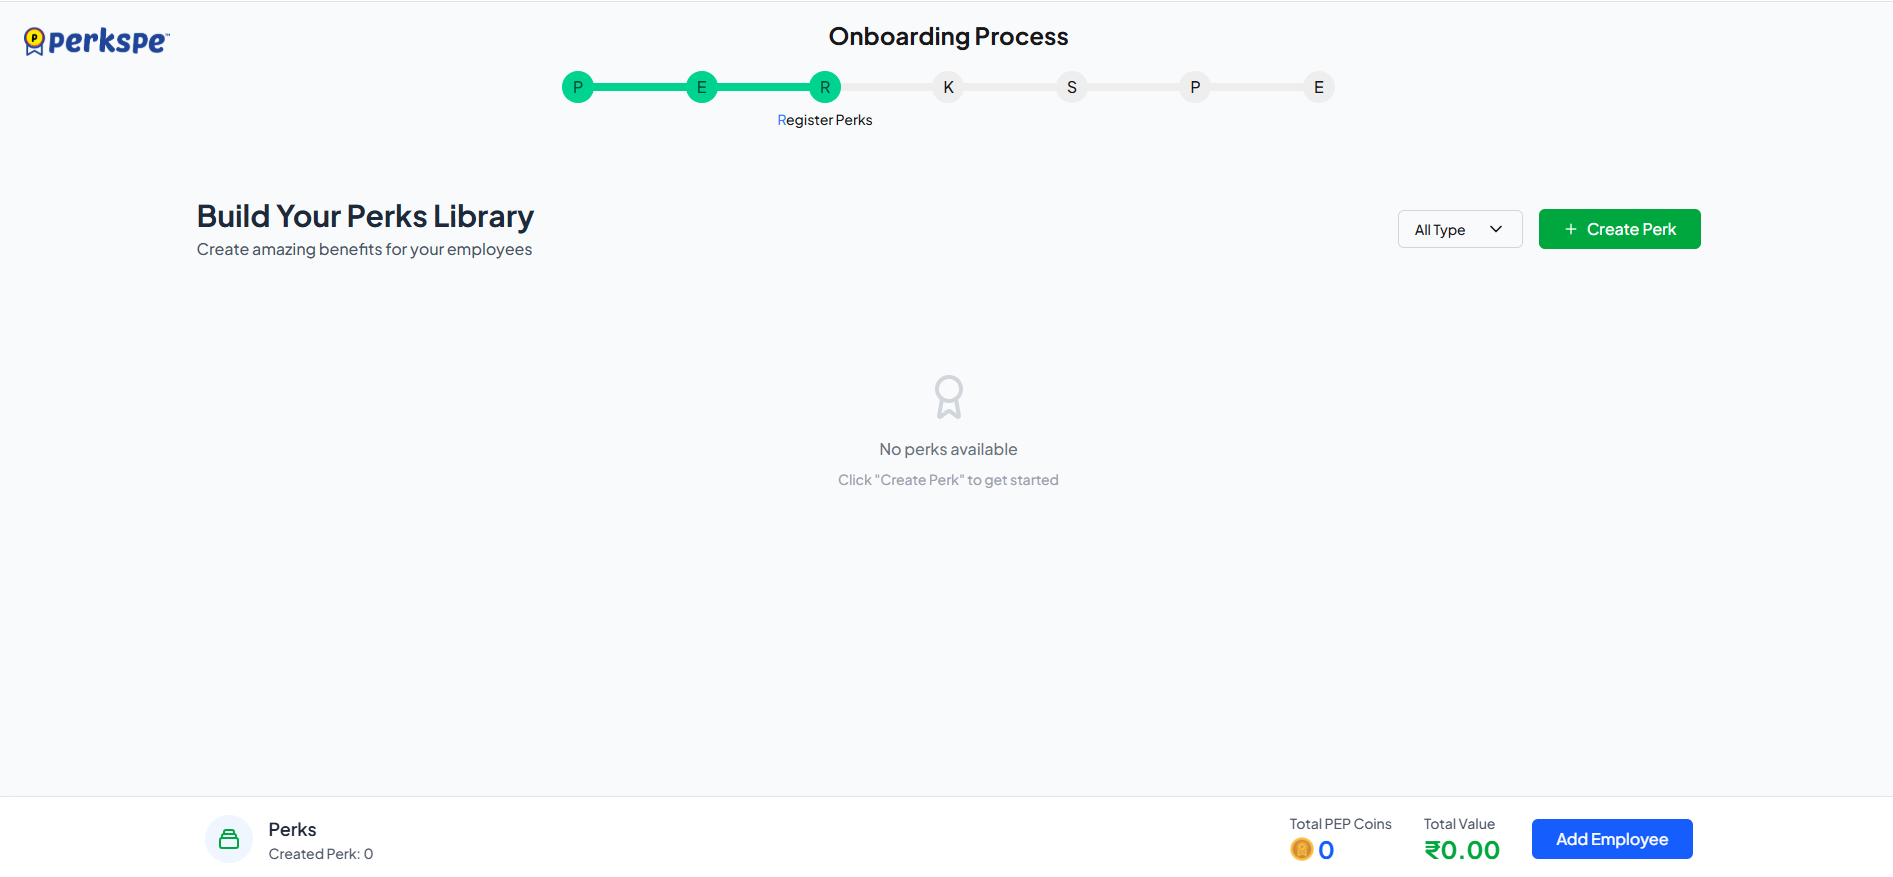
You'll see:
| Metric | Description |
|---|---|
| Total Perks | Number of perks created |
| Total PEP Coins | Total coins allocated |
| Total Value | Combined monetary value |
Create a Perk
Click + Create Perk to open the creation wizard.
Part 1: Basic Information
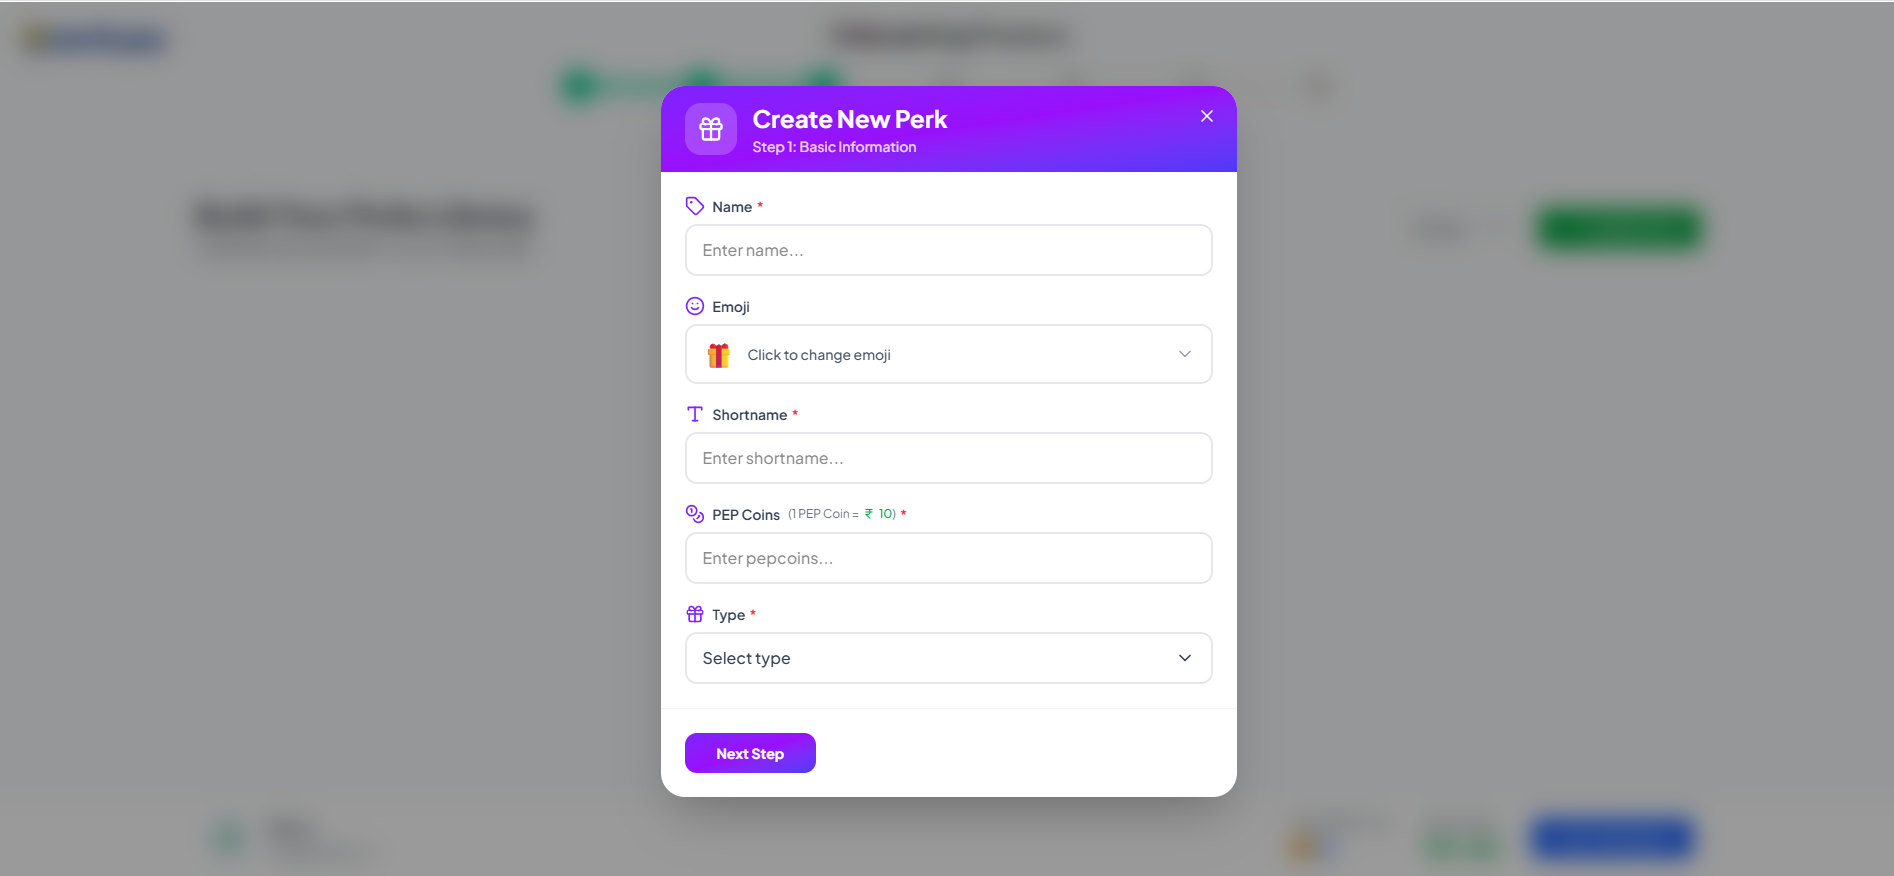
| Field | Description |
|---|---|
| Name | Full perk name (e.g., "Monthly Food Allowance") |
| Emoji | Visual icon for the perk |
| Short Name | Abbreviated name |
| PEP Coins | Value in coins (e.g., 100) |
| Type | Category of perk |
Available perk types:
- 🍔 Food
- 🏥 Medical
- ⛽ Fuel
- 🎂 Anniversary
- 🏆 Rewards & Recognition
- 📦 Others
Click Next.
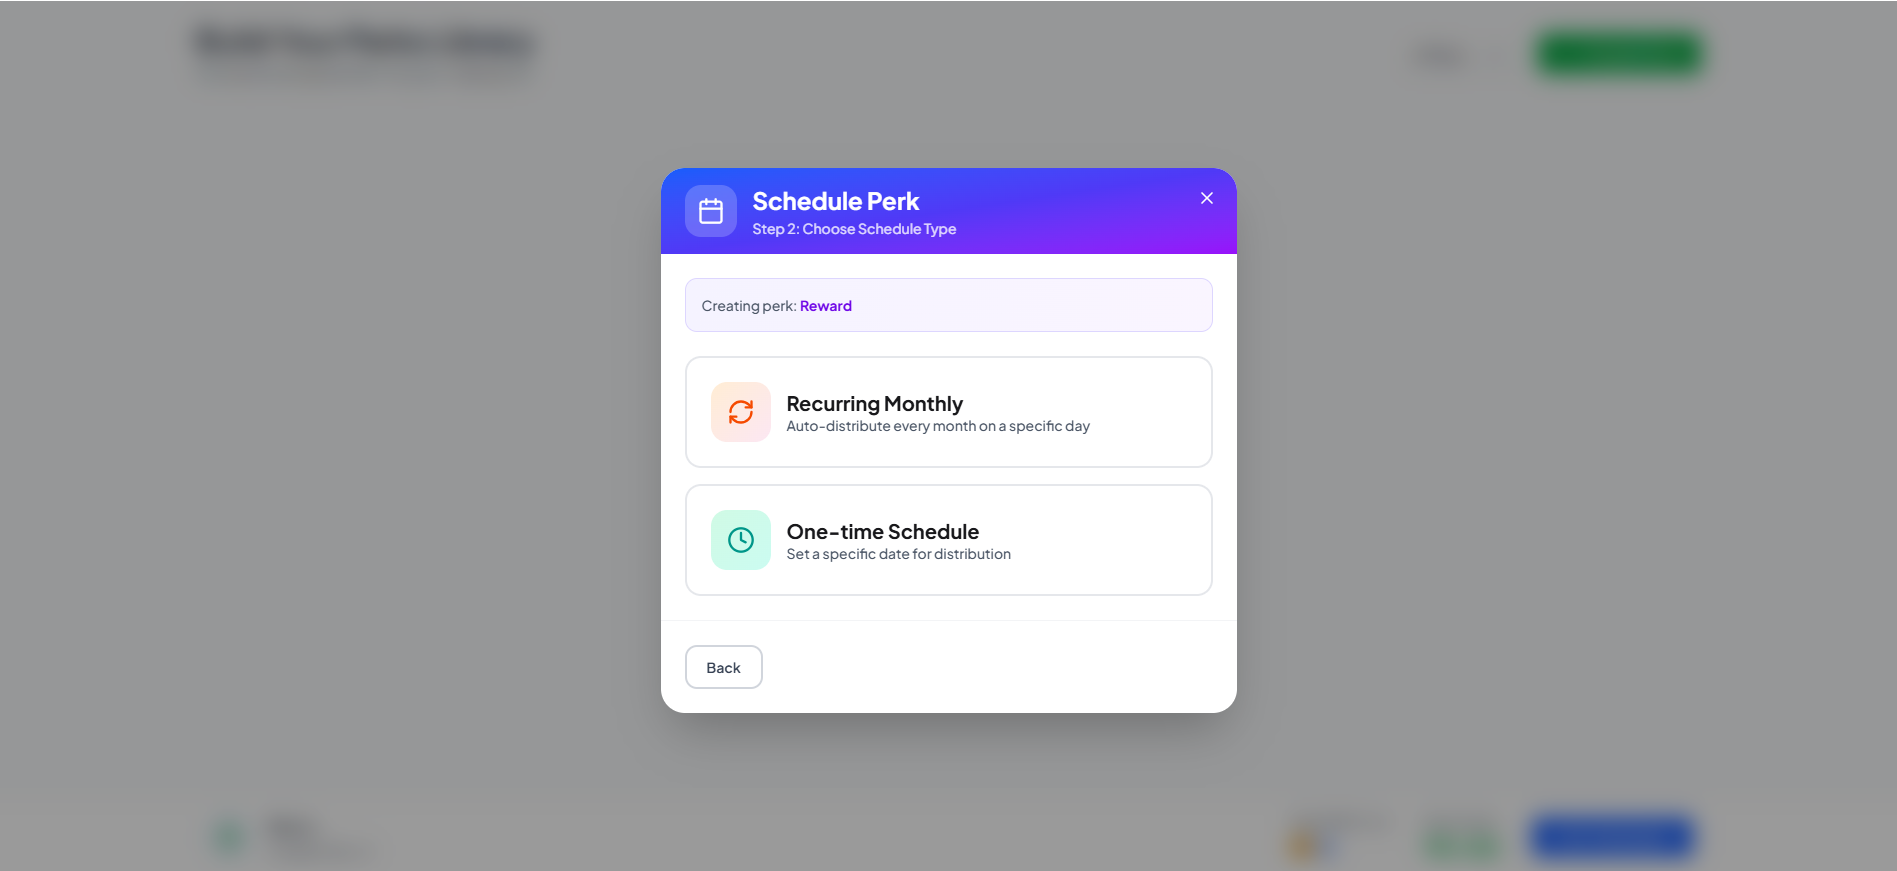
Part 2: Scheduling Options
Choose how and when the perk is assigned:
Option 1: Recurring (for Food, Medical, Fuel)
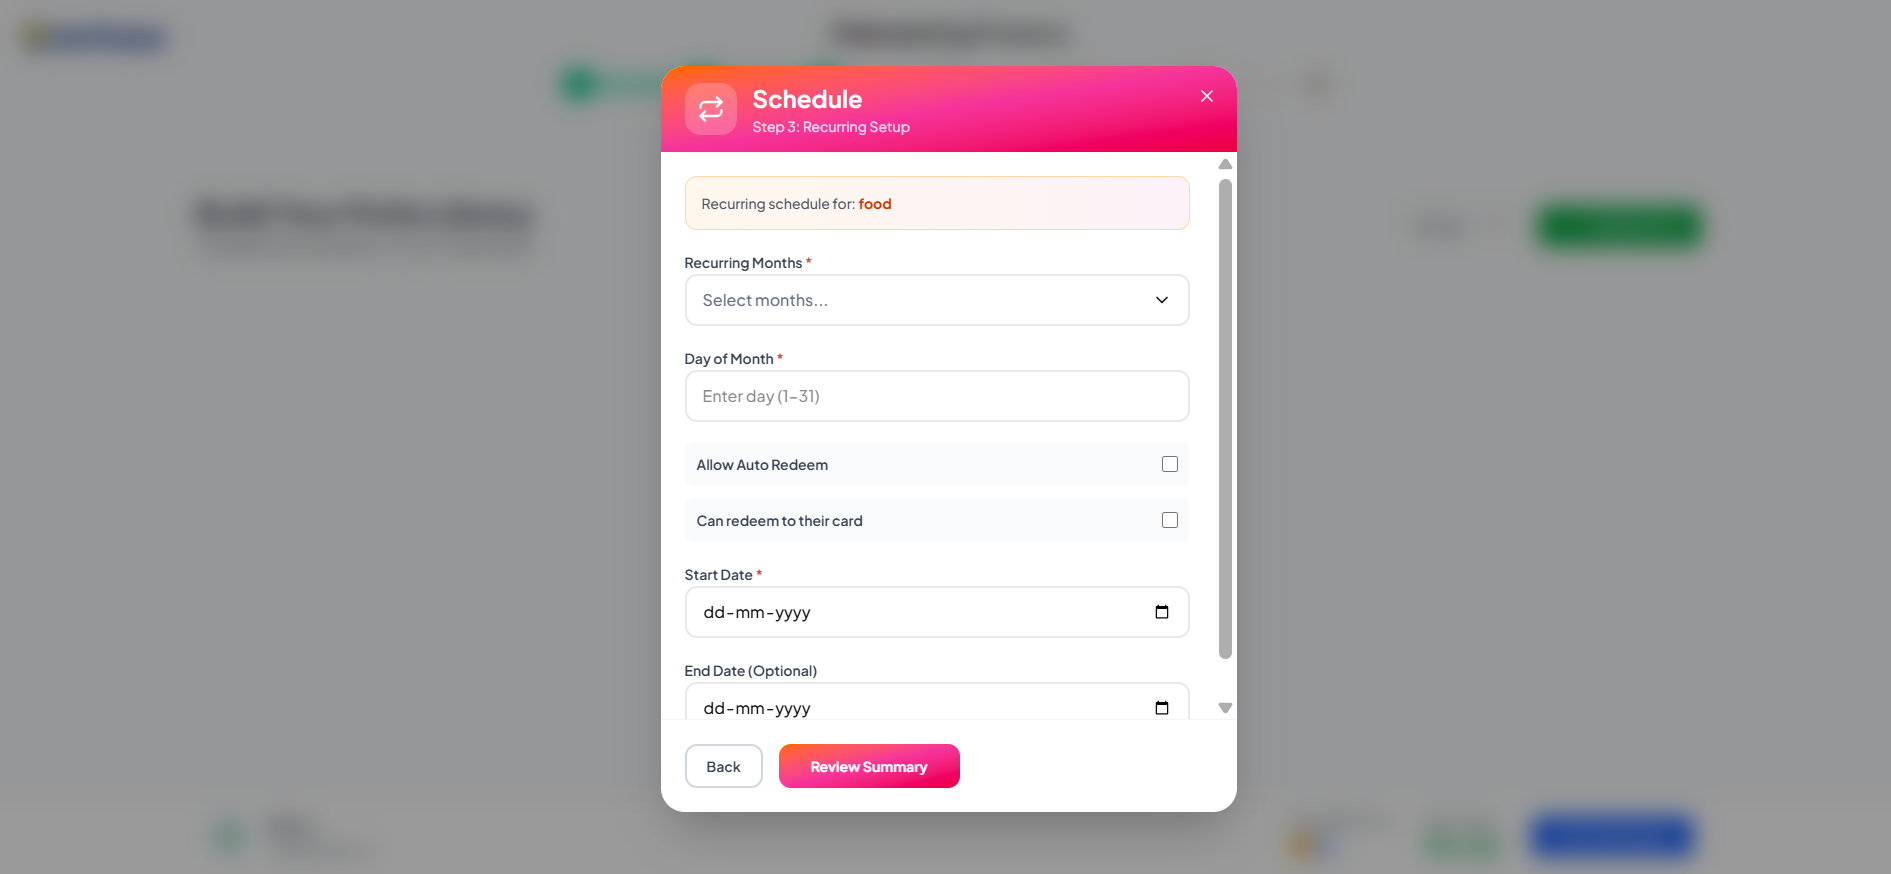
| Setting | Description |
|---|---|
| Recurring Months | Every month or specific months |
| Day of Month | Which day (1–31) |
| Allow Auto Redeem | Automatically redeem to card |
| Can Redeem to Card | Allow transfer to RuPay card |
Option 2: One-Time (for Anniversary, Birthday)
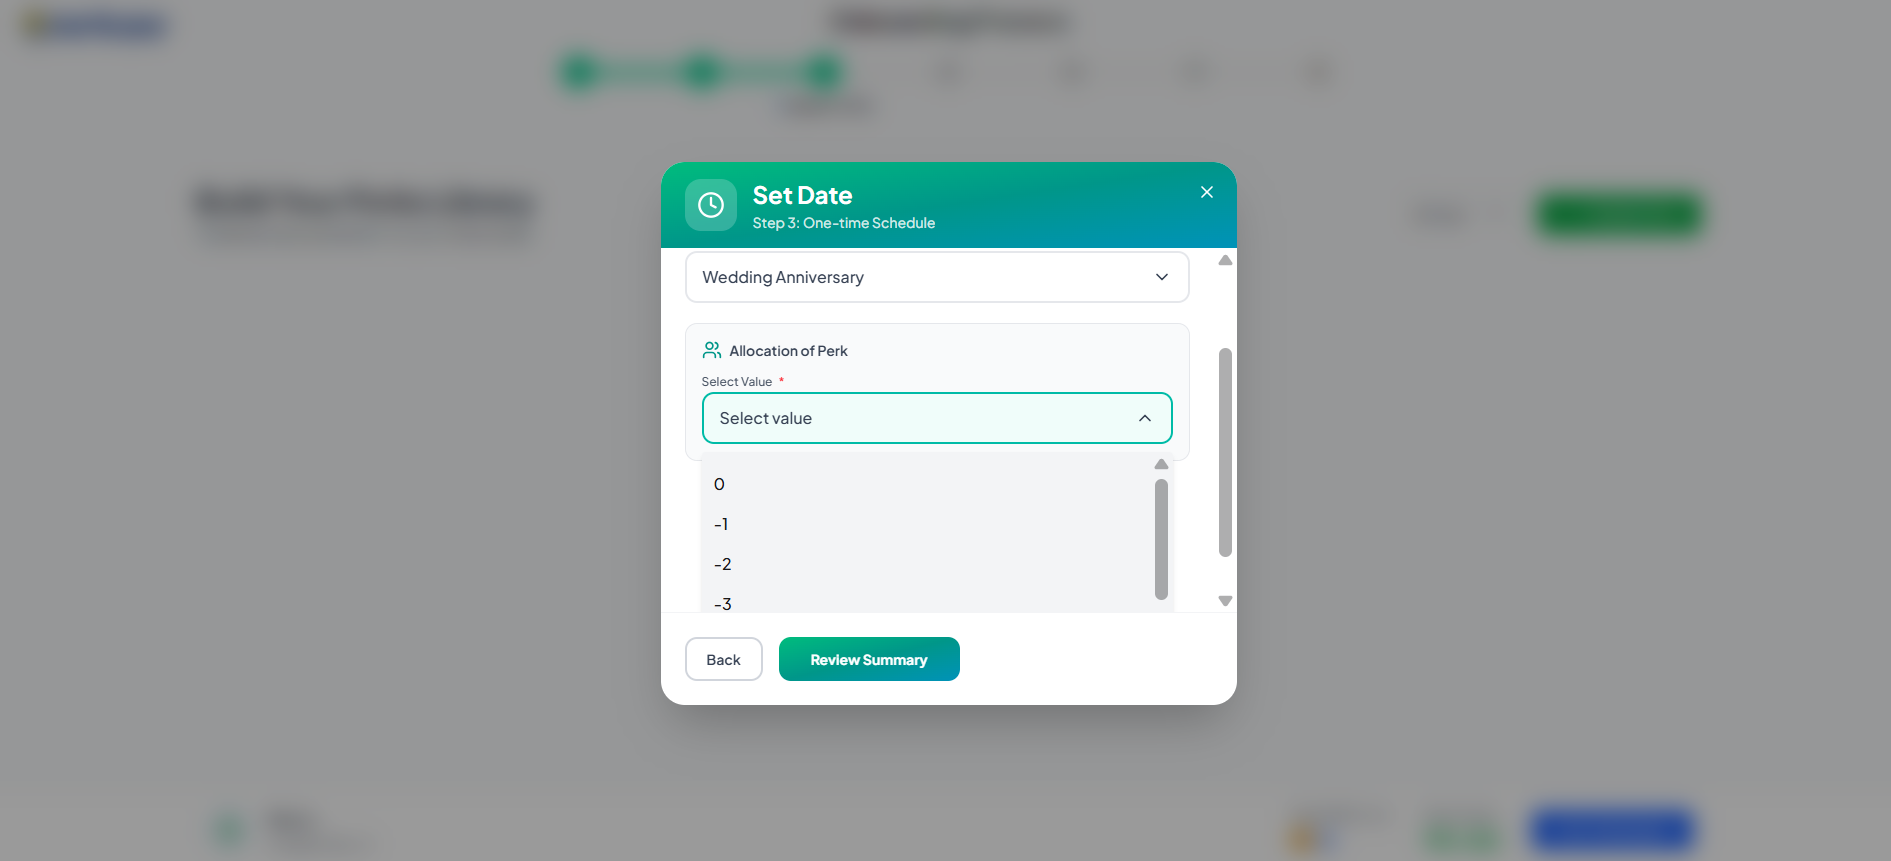
Pre-assignment days (-1 to -4):
- Select how many days before the event the perk is assigned
- Example: -3 = assigned 3 days before the event
Option 3: Rewards & Recognition
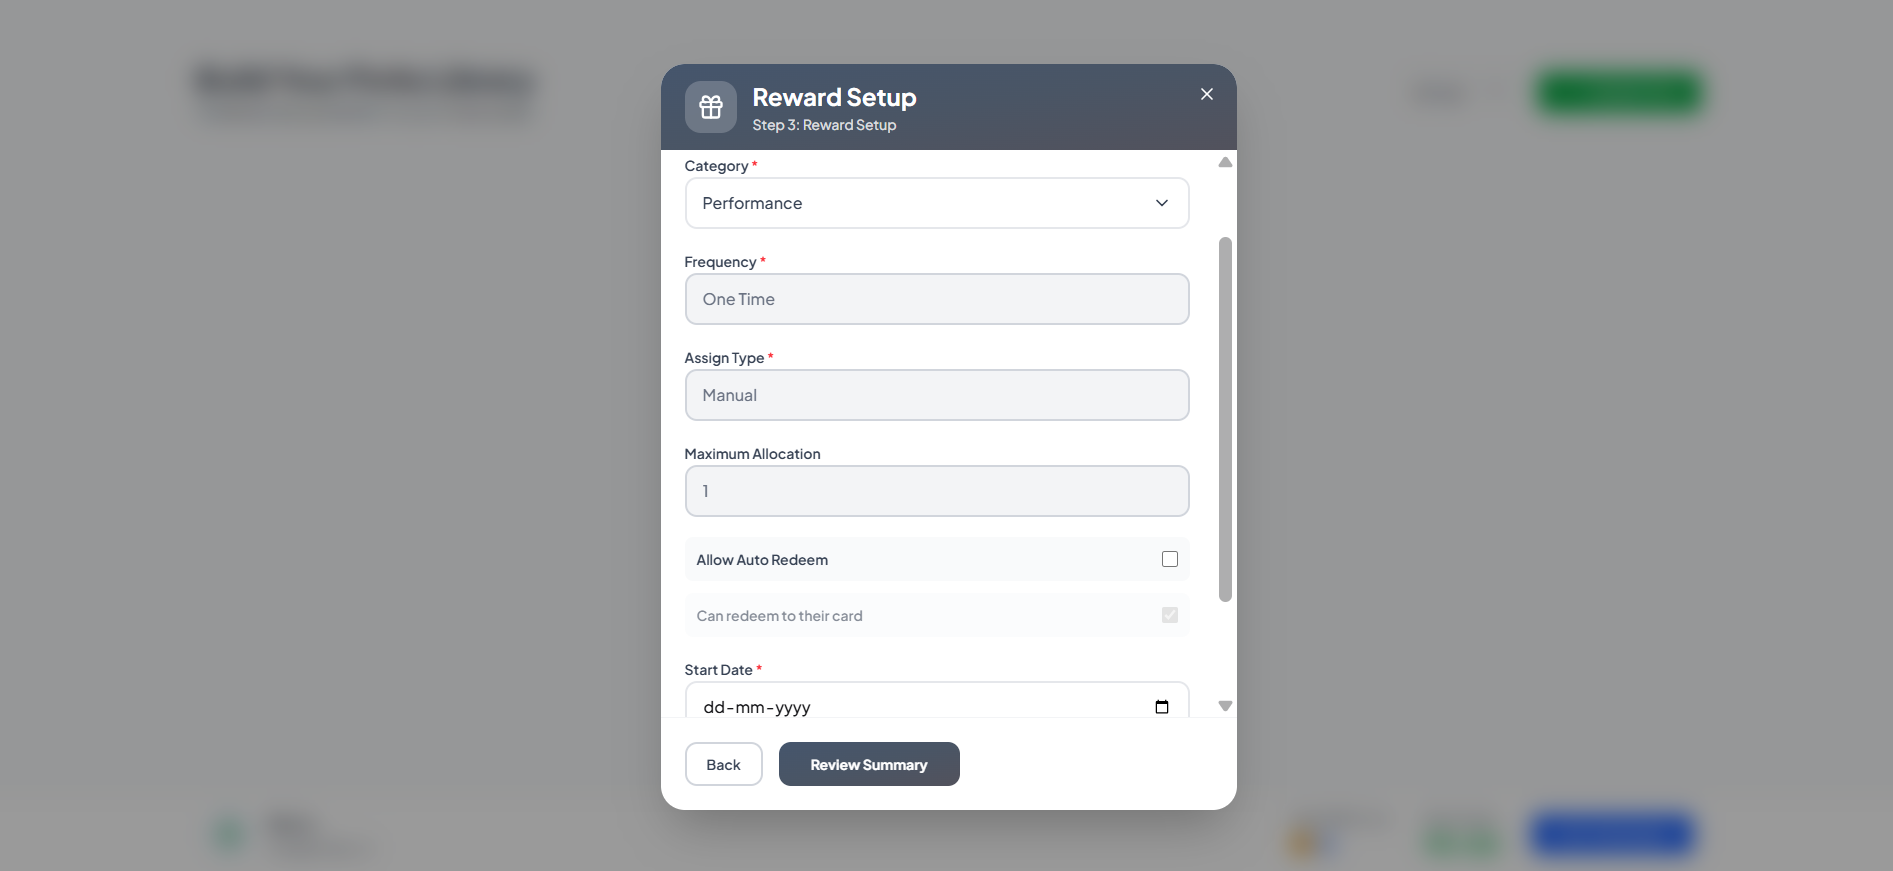
| Setting | Description |
|---|---|
| Category | Type of reward |
| Frequency | One-time (default) |
| Assign Type | Manual (default) |
| Maximum Allocation | Limit on distributions |
| Start Date | When the reward begins |
End date is automatically set to the next day.
Option 4: Others
Choose between:
- One-time — assigned once
- Recurring — repeats on schedule
Part 3: Review & Create
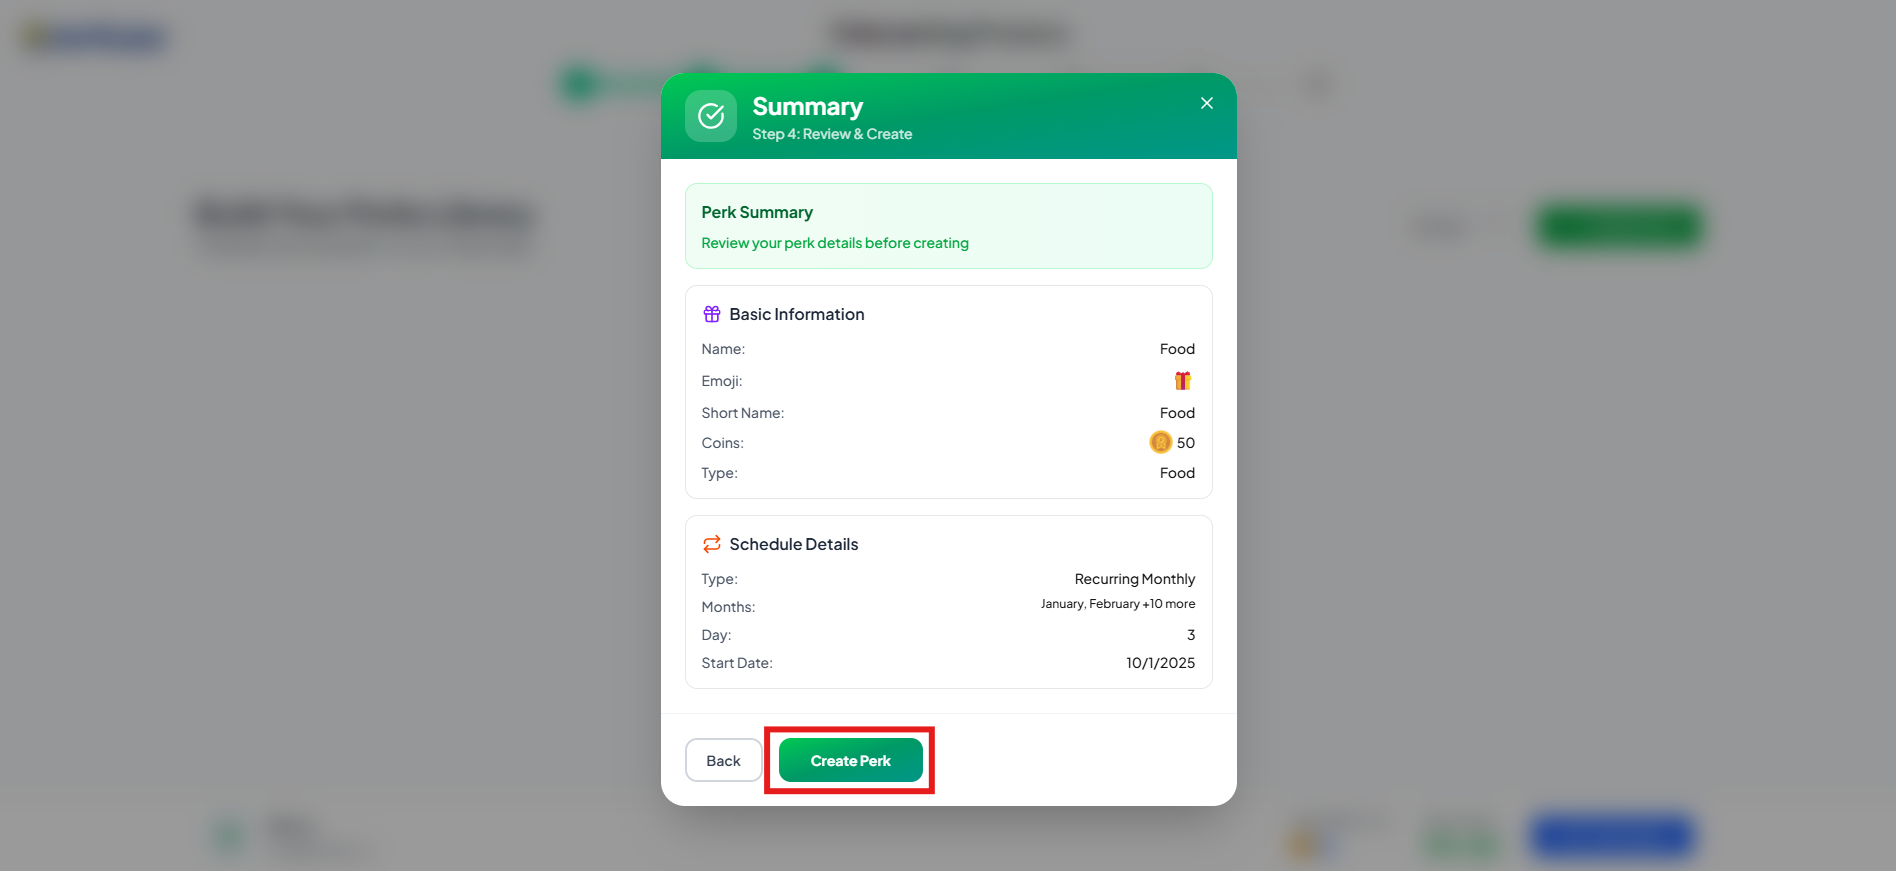
Review all details and click Create Perk.
Step 4: Know Employees
Add your team members to PerksPe.
Option A: Manual Entry
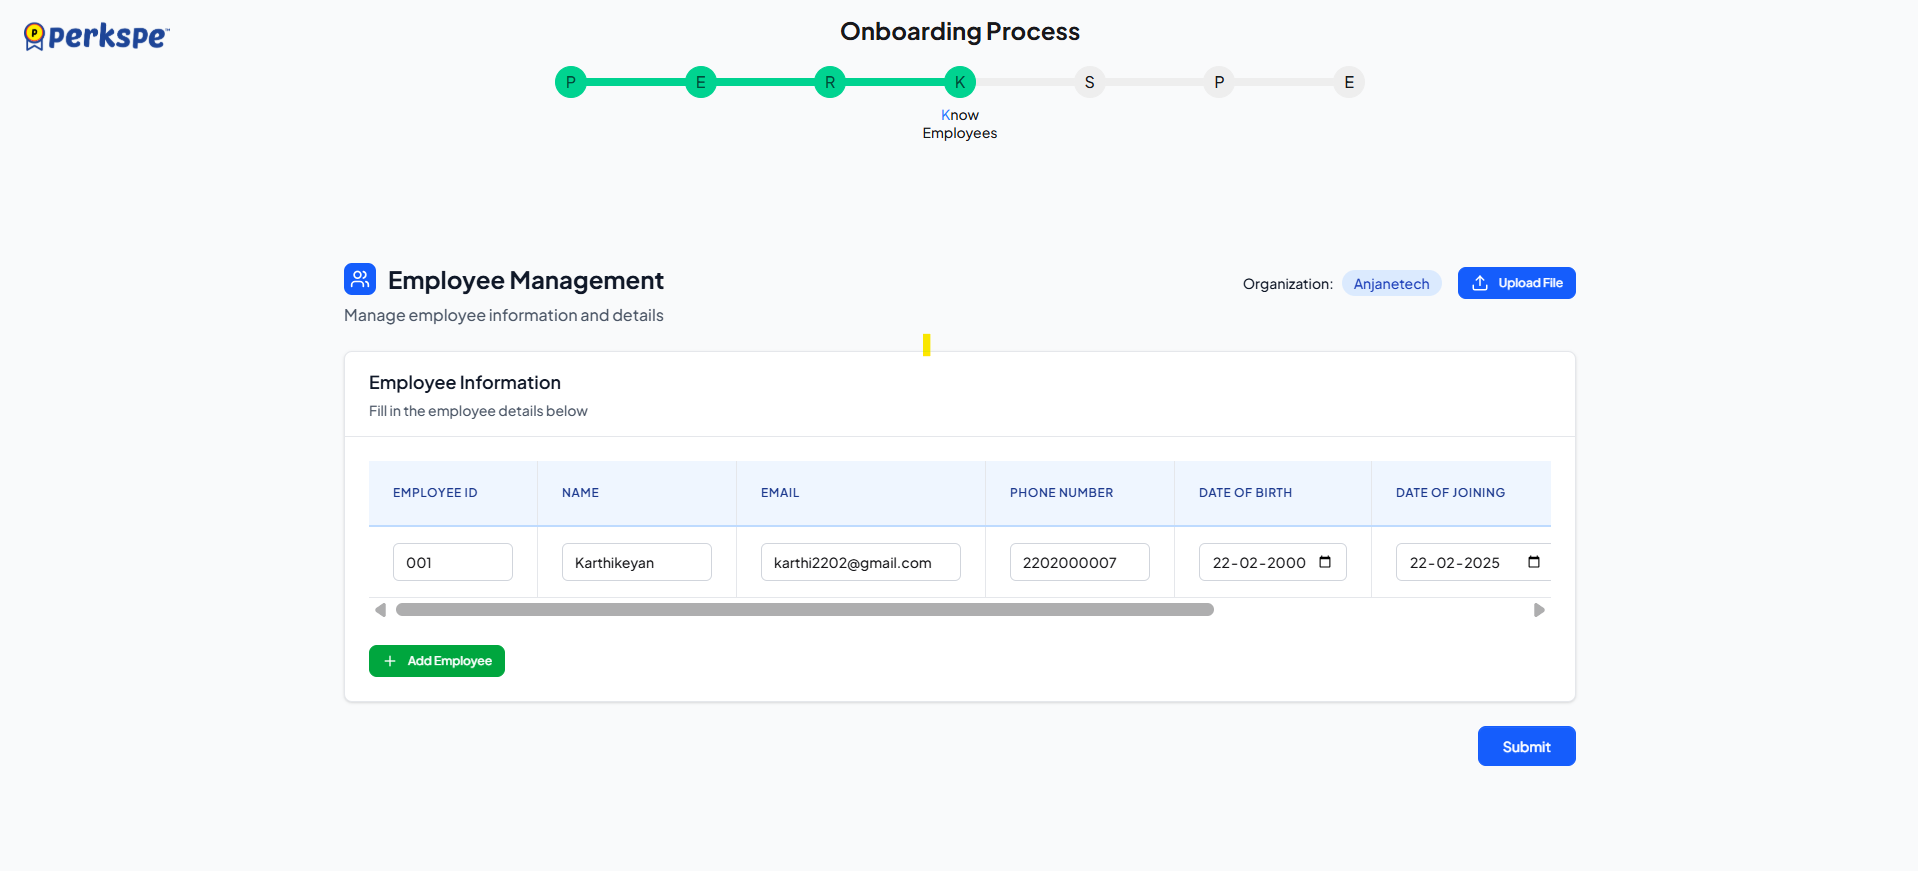
| Field | Format |
|---|---|
| Employee ID | Your internal ID |
| Full Name | Complete name |
| Work email address | |
| Phone Number | Mobile number |
| Date of Birth | DD-MM-YYYY |
| Date of Joining | DD-MM-YYYY |
| PAN Number | PAN Number |
| Marital Status | Single / Married |
| Portal Access | Yes = can log into PerksPe |
Action: Click + Add Employee, then Submit.
Option B: Upload File (Bulk Import)
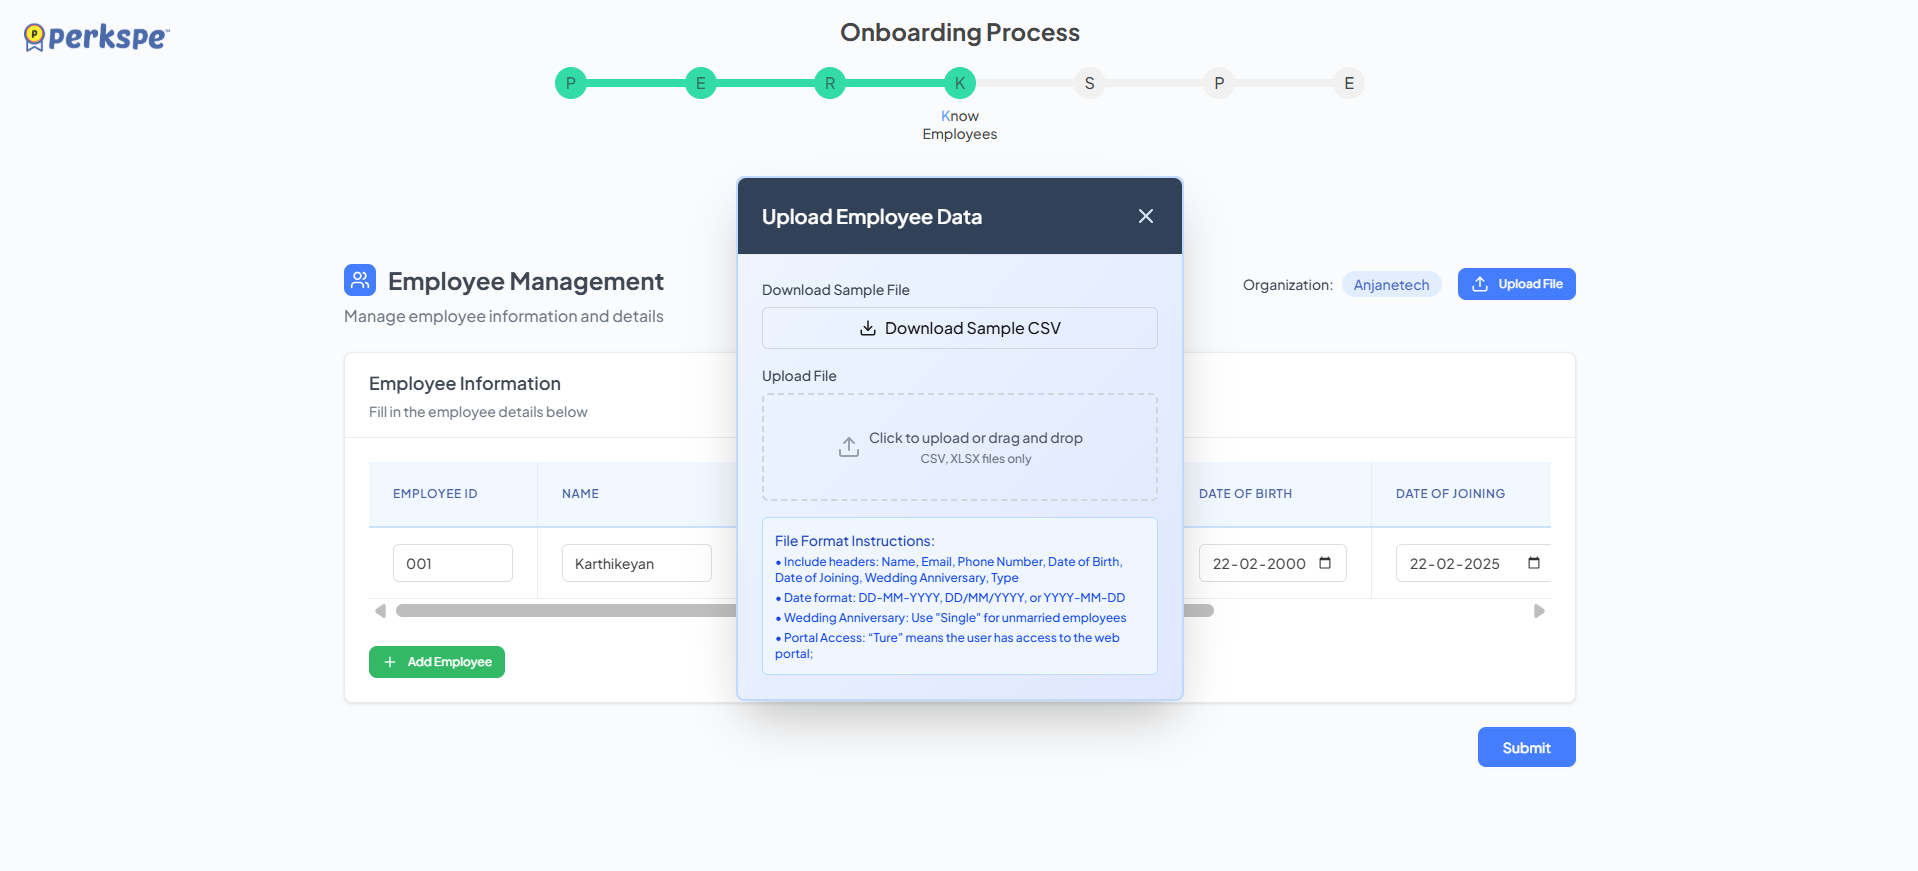
- Click Upload File
- Download sample CSV (optional)
- Prepare your file with these columns:
| Column | Required |
|---|---|
| Name | ✅ |
| ✅ | |
| Phone Number | ✅ |
| Date of Birth | ✅ |
| Date of Joining | ✅ |
| PAN Number | ✅ |
| Wedding Anniversary | Optional |
| Type | ✅ |
| Portal Access | ✅ (True/False) |
Supported date formats: DD-MM-YYYY, DD/MM/YYYY, YYYY-MM-DD
Action: Upload file and click Submit.
Step 5: Set Roles
Assign roles to each employee.
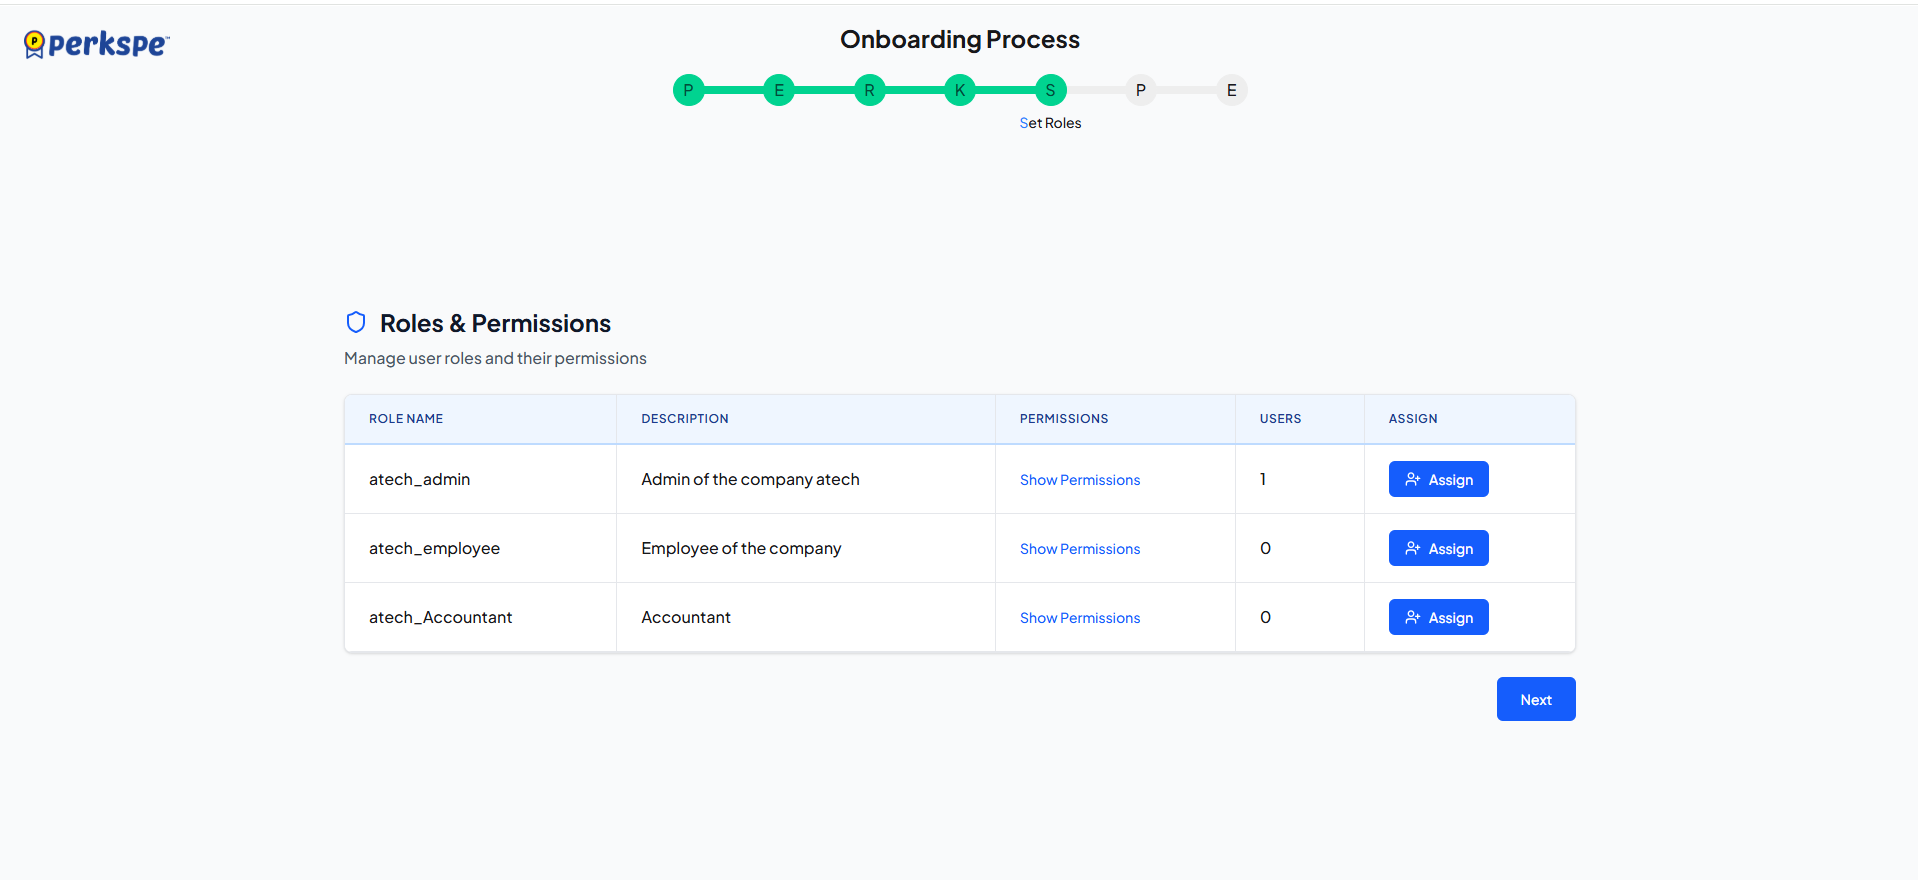
In the Roles & Permissions section:
- Select employees from the list
- Choose the appropriate role for each
- Click Assign
Step 6: Provide Perks
Assign perks to employees.
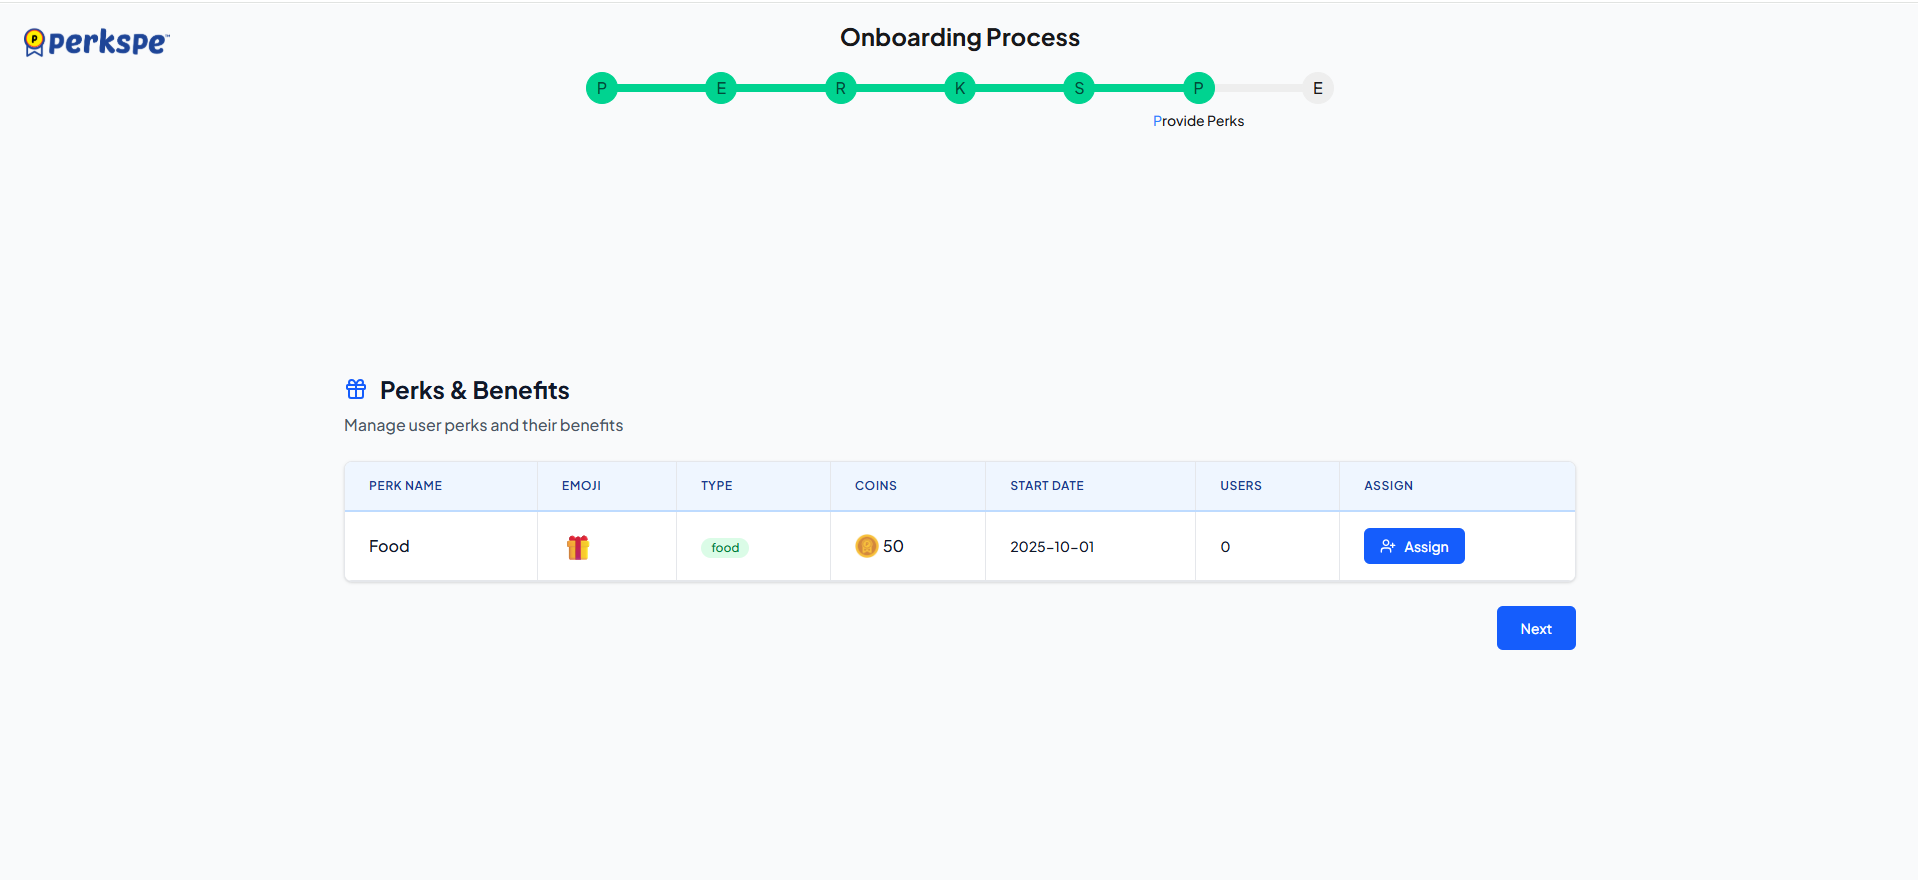
In the Perks & Benefits section:
- Select the perk you created
- Choose employees to assign it to
- Click Assign & Allocate
Step 7: Evaluate Summary
Review everything before completing setup.

Final Checklist
| Section | What to Review |
|---|---|
| Organization | Company name, address, tax numbers |
| Roles | All roles created and configured |
| Perks | Benefits created with correct values |
| Employees | All team members added |
| Role Assignments | Correct roles assigned to employees |
| Perk Assignments | Perks assigned to right employees |
If everything looks correct, click Complete Setup.
🎉 Congratulations! Your PerksPe organization is now ready.
Quick Reference
| Step | Action | Button |
|---|---|---|
| 1. Plan | Enter company info | Create Role |
| 2. Establish | Set up roles | Create Perk |
| 3. Register | Create perks | Next / Create Perk |
| 4. Know | Add employees | Submit |
| 5. Set | Assign roles | Assign |
| 6. Provide | Assign perks | Assign & Allocate |
| 7. Evaluate | Review all | Complete Setup |